Are you an archery enthusiast looking for a new challenge? If so, making your own 3D targets for archery could be the perfect solution. With a few basic tools and supplies, you can easily build realistic, 3D DIY archery targets that will help you increase your accuracy significantly.
This guide will walk you through the basics of DIY 3D archery target construction. You’ll learn how to build your own DIY archery targets with common items and save you money in the process.
Let’s explore the best ways you can make a 3D archery target at home!
But first, why do you need to craft an archery target, when you can just hit the nearest retail store? I’m glad you asked. Here’s why
The Reason You Need Homemade Archery Targets

The first and the most obvious reason you might consider building your own 3D archery targets is cost (duh!). Purchasing a ready-made model can be costly, and making one yourself is much more cost-effective.
However, there are other reasons to make your own 3D archery targets. Making them at home allows you to customize the size and shape of your target. This way you can build a target that fits your specific needs for distance and accuracy.
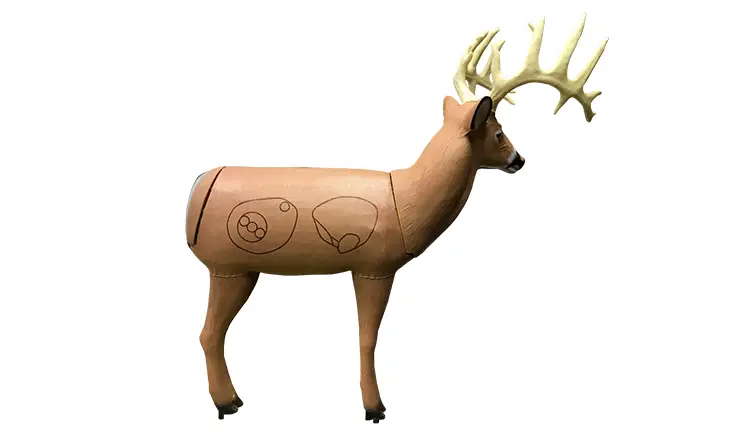
It also allows you to be more creative in the materials you use, creating a unique target that stands out from the rest. A 3D archery target provides the same challenging angles and aiming areas of real game animals, such as deer, elk, turkey or hog.
Plus, crafting your own archery targets is a great way to get started with a new hobby, or hone your existing skills. It gives you an opportunity to practice shooting at realistic, life-sized mockups instead of paper targets.
Now that you’re convinced on making a DIY 3D archery target, let’s explore the different kinds of 3D Targets you can make.
Types of DIY 3D Targets
When it comes to making your own 3D archery target, you have several options. Here are the four most popular types of DIY 3D targets.
Foam Block Target
This option uses layered pieces of foam to create realistic shapes and contours that closely resemble actual animals. You can also use your overused foam floor mats to create something like a 3D deer target.
This is an easy and cost-effective way to make a 3D target but may not last as long as other DIY archery targets.
Wood Or Metal Frame Target
The second type of DIY archery target is a wood or metal frame target. This method involves constructing a frame out of wood or metal and then covering it with rubber foam or an alternative material such as burlap for realism.
These targets are more durable than foam blocks and provide a more realistic shooting experience.
Plaster Mold Target
Next on our list, we have the plaster mold target. This option involves creating a clay or wax mold and then pouring either sand or plaster into the cavity for realism. Plaster molds provide the most realistic look and feel, but they also require more skill to construct.
Bag Archery Target
Finally, the bag archery target. This type of DIY 3D archery target is arguably the easiest and most cost-effective option.
Here, the plastic bags are filled with rubber pellets or foam pieces and then hung from a tree or other structure to create a realistic target to shoot arrows at. However, this is the type that also lasts the shortest.
Now that you know the different types of DIY archery targets you can make at home, let’s look at the easiest way you can build a 3D target.
DIY 3D Archery Target: How To Make Archery Targets At Home
The process of making 3D archery targets is actually quite straightforward and requires minimal tools. Here is what you will need for your DIY project:
Tools Required
Plywood or Cardboard Sheet: Plywood is usually the base materials used to construct the frame of the archery targets. You can also use leftover cardboard boxes instead of plywood/wooden frames as a cheaper alternative.
Foamboard: This is a lightweight material that adds volume and shape to your 3D targets. It also adds cushioning, which will help protect your arrows from damage. Most 3D targets you see around you are 3D foam archery targets.
Elastoplast Tape: This is used to stick the foamboard pieces together and create a 3D shape. Use duct tape if you don’t have access to elastoplast tapes.
Spray Adhesive: This is used to adhere the foamboards onto the plywood or cardboard sheet base, providing extra support and security.
Paint or Markers: You can use paint or markers to decorate your targets with realistic details, such as fur patterns, leaves, and tree bark.
Outdoor Sealant: After you have finished constructing your 3D archery target, you should use an outdoor sealant to protect it from the elements.
Once you have gathered all of these materials, you can start building. The process looks something like this.
Step-by-Step Guide How To Make 3D Archery Targets
Now, we’ll explore the step-by-step process of making a DIY archery target at home. Here’s how it goes:
Step 1: Prepare the Material
Cut out pieces of plywood or cardboard to serve as the base for your targets. You will need four rectangles to make a square, or four pieces that measure the same dimensions for circular targets.
Step 2: Apply Adhesive Extensively
Attach the foamboard onto the plywood or cardboard base with spray adhesive. Make sure to cover all surfaces evenly, as this will provide extra support and security.
Step 3: Shape Your Target
Cut out additional pieces of foamboard to shape your 3D targets. You can use circles, squares, triangles and other shapes depending on what type of animal you are trying to replicate.
Step 4: Give a Realistic Outlook
Use elastoplast tape to stick all of the individual pieces together and create a 3D shape. This should be done carefully so that your target looks natural and realistic when completed.
Step 5: Paint the Target
Once you have finished constructing your 3D archery target, you can use paint or markers to add details such as fur patterns, leaves and tree bark.
Step 6: Use Sealant
Finally, seal your 3D target with an outdoor sealant to protect it from the elements. Here’s a video guide on the whole DIY process.
And there you have it! You’ve just learned how to make 3D archery targets by yourself. With some patience and creativity, you can create realistic mockups of game animals in no time.
What about the Bullseye?
Now that you know how to make 3D archery targets, you may be wondering what about the bullseye, right?
Well, you can use a paper plate or piece of thick cardboard as your bullseye target. You can also buy pre-printed targets that have traditional archery scoring rings printed on them.
These are great for both competitive and practice purposes. However, another pretty common option is to turn the target’s killzone into the bullseye.
You’re Done! But, Keep These in Mind…
Before you start shooting your 3D targets, here are a few things to keep in mind :
- Make sure the target is placed in a safe area, away from any buildings or other objects.
- Always use protective gear such as eye and ear protection when shooting broadheads/arrows at 3D targets.
- Be sure to check your arrows for damage after every shot and replace them if necessary.
- Clean up the area around your target to prevent debris from affecting your accuracy and safety when shooting arrows at it.
- Have fun! Archery should be enjoyed, so take some time to relax while you practice your skills with your DIY archery targets!
And with this, we’re at the end of our today’s tutorial. This guide provided all the information you need to start crafting a variety of DIY 3D archery targets.
Whether you are using traditional, compound bows, or crossbows, honing your skills in the art of archery will become a lot easier if you have easy access to good accessories. I hope the information on this guide proves to be helpful. Thanks for reading this far. I wish you a great weekend ahead.
FAQs
How Many Layers Of Foam Do I Need For My Target?
Generally speaking, for light absorption (low-velocity impacts), one or two layers should suffice; for medium and higher levels of absorption (like high-velocity impacts), three or more layers may be necessary.
Is It Easy To Install And Transport The Targets?
Yes. Foam targets are lightweight, durable and can be easily molded or cut into desired shapes. Additionally, the foam material has low thermal conductivity, making it ideal for use almost anywhere.
Does The Type Of Bow Affect What Size Target Should Be Used?
Yes, the type of bow you are using can affect what size target you should use. The target needs to stop an arrow without getting damaged. Usually, the heavier your draw weight and faster your arrow speed are, the larger and more durable a foam target you’re going to need.


Leave a Comment