If you are a beginner-level bow hunter, you may be wondering why you need to have an archery target. Well, the reason is simple.
Becoming a skilled bow hunter requires regular practice as well as ongoing enhancement of your techniques.
Except for these two things, there is no short-cut way.
Among the many different options, bag targets are immensely popular having their legacy rooted back hundreds of years.
Eager to know how to make an archery target at home?
Well, I’ve put together some easy steps so you can make archery targets easily. Don’t be impatient, please!
I have a few words to share before you start the task.
Facts About Archery Target Using a Bag
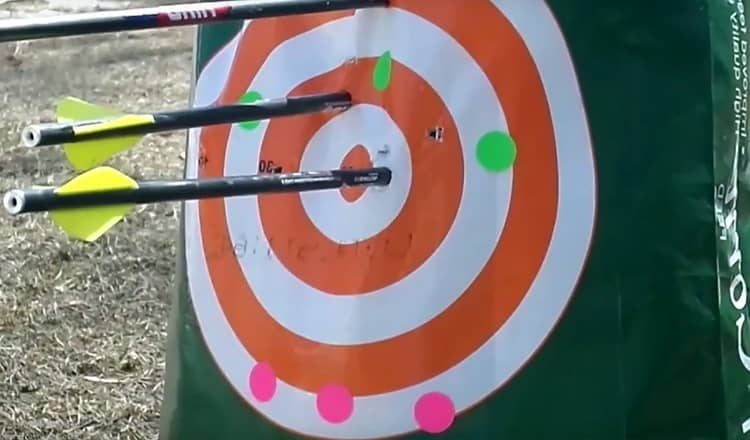
Beginner-level bow hunters practice target shooting using a bag specially designed and made for archery target practice.
So, every archer regardless of their skill and experience is familiar with the bag.
The bag is filled with synthetically manufactured fiber. But this fiber is not polyester.
Thanks to synthetic fiber, the bag stops the arrow without deflecting and also facilitates easy removal of the arrow.
One drawback of the bag is if a broadhead is used during target practice, it will be stuck firmly with the bag.
Removing the broadhead will tear apart the outer layer of the bag.
So to preserve your bag for a long time use, refrain from using broadhead while target practicing.
Another limitation of the bag is it does not withstand exposure to outside elements like rain or moisture.
If exposed to elements, the bag lost its durability.
Using the bag for shooting practice is quite convenient for bow hunters. They can use it in an indoor range.
So, they need not carry the bag to the shooting range.
The bag is easy to set up. Whenever you want to practice, simply hung it and started shooting.
But there is only precaution. Do not use heavy field points. The tip of the arrow is called the field point.
The inexpensive bag is also ideal for compound bow practice. But while using a compound bow, you cannot use broadheads.
It is because the broadheads will be stuck in the target and removing them will cause substantial damage to the target.
How to Make an Archery Target: A Step-By-Step Tutorial

Now that you know what matters and what doesn’t, I think it’s safe to advise you to proceed.
As told earlier, I’ll talk about a target that uses a bag and makes a good target for daily shooting practices.
1. Required Supplies
Here is what you need for the target, gather the below things.
- Gunny sack
- Metallic coil
- Shrink wrap you need this stuff a lot
- Cardboard and paint spray. Cardboard or disposable paper board can be used as a target by spraying paint spray on it.
2. Spray Your Target
I don’t insist that you do it without mistakes. You may skip it. But I did it, and the final output was better than I hoped.
- Draw a bullseye design on the board made of disposable paper and spray paint on it.
- Spraying paint on it prior to filling the bag will retain its shape and cleanliness of the bag.
3. Stuff the Bag
It’s your turn to stuff the bag with what I have recommended below.
- Fill the bag with shrink wrap
- Fill the shrink-wrap bag evenly
- The bag can hold plenty of shrink wrap
- Stuff the bag with shrink wrap in such a way that there is no lump formation inside the bag
- Stuff the bag with shrink wrap as much as you can without tearing the bag
4. Sew the Bag Correctly
Now, you have to work much like a surgeon. Don’t panic, my friend.
- It’s now time to close the opening part of the bag by sewing.
- Sew the bag by keeping uniform distances between stitches
After completion of the stitching task, squeeze the bag gently in order to make the attractive looking.
You’ve got a bag that’s strong enough to tackle the pressure your favorite arrows are going to put through!
Making a bag like this which involves stuffing followed by sewing does not require spending much time.
Here’s a Story You Should Read in a Minute!
During my target practice, I used Mathews black Max 2 compound bow.
I was quite satisfied with the performance of the bag since the arrow I used did not penetrate through the target.
That’s it. I hope you have enjoyed my inexpensive DIY archery target bag guide for target practicing.
Don’t hesitate if you need to share or know anything else about the archery target and the best shooting practice!


Leave a Comment