Learning how to adjust a rifle scope may seem daunting, especially if you’re a beginner. However, with a little bit of instruction, you’ll be able to confidently take on this basic rifle scope adjustment.
But how do you adjust a rifle scope? Well, that’s what we’re here to explain.
In this guide, we’ll cover the basics of rifle scope adjustment and teach you how to make any necessary adjustments for a perfectly aligned sight picture.
So, whether you’re just starting out or looking for a refresher course, keep reading for all the information you need to know about how to adjust a scope like a PRO!
Let’s get right into it!
Anatomy of a Rifle Scope
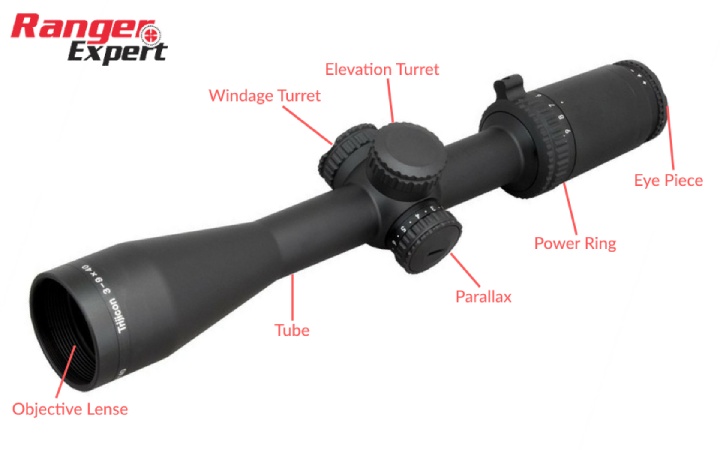
Housing
This is the upper casing of the scope that holds everything together. Most scope housings feature lightweight and durable aluminum or alloy. The higher the aluminum quality, the pricier the scope will get.
Glass
You’ll notice glass lenses on the two opposite sides of your scope, and the rest of the glass is hidden inside the housing. The quality of the glass affects the scope’s price and weight.
The lens nearest to your eye while aiming is called the ocular lens, and the one on the opposite side is named the objective lens.
The most important quality for the optical system of your scope is the capability to gather as much light as possible to provide a sharp image even in low light conditions.
Tube
This is the connection between the two lenses of the scope. Usually, modern scopes come in 30-mm, 34-mm, and 1-inch tube sizes.
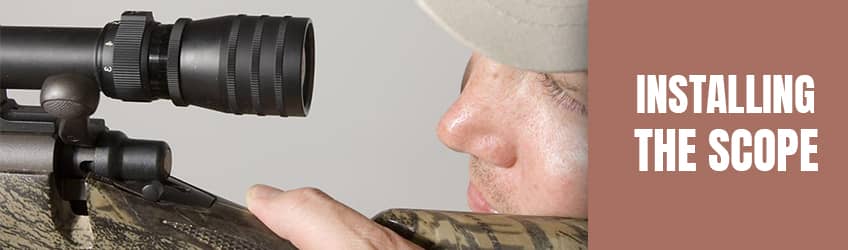
It’s crucial to choose compatible scope rings for your tube. Otherwise, you won’t be able to mount your scope to your gun.
Reticle
This is the aiming point you see when you look through the eyepiece. This can be defined as a series of dots or lines designed to help you aim.
Although the standard reticle can be just a single dot, there are countless reticle options to choose from.
Some more popular reticle designs include Mil-dot, Duplex, and DMC.
Magnification
The magnification of a scope refers to the system for adjusting the optical lens to focus at different distances.
Most modern-day lenses come with an adjustable magnification range, which you can change by turning the magnification knob.
The knob is located near the eyepiece and allows you to adjust the zoom level.
Usually, short-medium range scope features 3-9X magnification, whereas long-range scopes (like the Remington 700 scopes) feature a wider range (i.e., 4-15X).
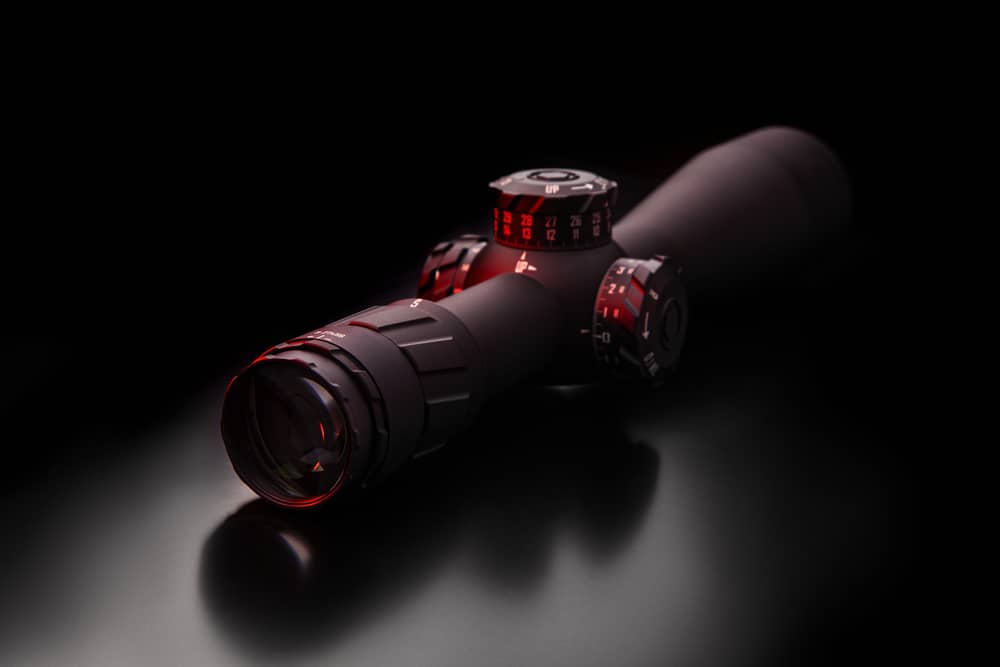
Turrets
The outer part of a riflescope is designed with two knobs known as Turrets. The upper part of the knob is known as the elevation, which controls the elevation adjustments (up/down).
The windage adjustments (right/left alignment) can be made by adjusting the windage turrets. The turrets create room for adjustment and help focus the reticle upward, sideways, or downwards in the direction of the point of impact.
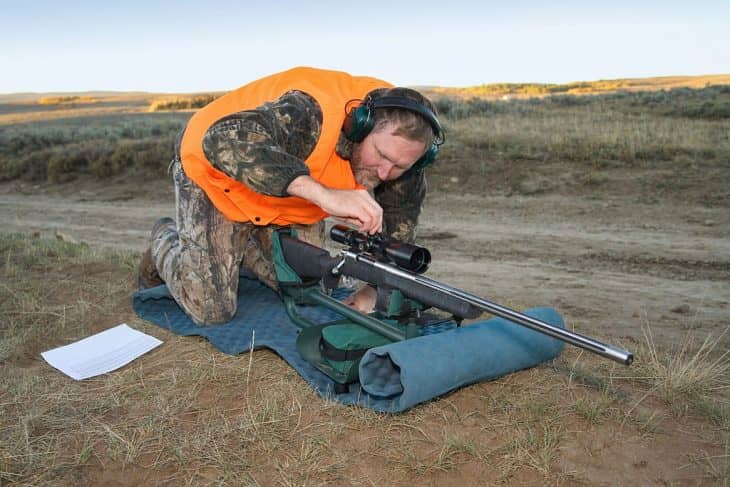
How to Adjust a Scope: Step-by-step Guide
Now that we’re done with all that industry jargon let’s dive into how to adjust a scope like a pro. Here’s how adjusting rifle scopes go.
Step 1: Establishing a Range
The first step is to determine how far away the target will be before you start adjusting your scope.
Knowing how far away your target is helps you choose which magnification setting will work best for that particular distance.
For example, if your target is 100 yards away, set the magnification to 6x or 7x.
Step 2: Setting the Windage
Once you have determined how far away your target is, the next step is to adjust the windage. For this, use your windage turrets located on either side of your scope.
Start by adjusting the windage to the left or right until your crosshairs align with where you want your bullet to go. You can use a laser bore sighting tool for accurate alignment.
Once you have done this, tighten the turrets by screwing them clockwise.
Step 3: Adjusting the Elevation
The third step is to adjust the elevation. For this, use your elevation turret on top of your scope and adjust it up or down as needed.
Again, you can use a laser bore sighter for accurate adjustment. Once you have adjusted it to where you want it to be, turn the knob clockwise until it locks in place.
Step 4: Other Adjustments
Parallax and magnification are two other adjustments you can make to your scope.
Parallax is when the reticle appears to move in relation to the target as you move your head behind the scope.
Parallax can cause the reticle to move even if the gun does not, which can be solved by using the parallax adjustment knob located on top of the eyepiece.
The magnification knob is usually located near the ocular lens and allows you to zoom in and out of your target.
Once you have made all the adjustments to your scope, it’s time to take aim and fire!
Step 5: Sight-in Your Scope
The last step is to sight in your scope. This means you will need to fire several rounds at a target from a certain distance to ensure that the scope is adjusted correctly.
Once you have done this, you can now use your rifle confidently, knowing it has been sighted correctly!
The Reason You Need to Adjust Your Scope Regularly
Now that you know how to adjust a scope, it’s time to explore why you need this. Here goes
The scope is an important part of your rifle. It gives you accuracy and precision in your shots. Therefore, it is essential to make sure that your scope is well-adjusted before each shooting session.
Making adjustments regularly ensures that the reticle lines up with the point of impact and that the magnifications are set correctly for the distance of your target.
Regularly adjusting your rifle scope will also help you maintain consistency in performance over time.
How to Zero A Scope: A Quick Guide
Zeroing a rifle scope is the process of aligning the reticle with your point of impact. This can be done at a shooting range using a target and several rounds of ammunition. Here is how to zero your rifle scope in five simple steps:
Step 1: Mount Your Rifle
Securely mount your rifle on a shooting stand and make sure it is in the correct firing position.
Step 2: Fire at the Target
Fire several rounds at your target from a certain distance to ensure the scope is properly aligned with your point of impact.
Step 3: Adjust Your Scope
Using the windage and elevation turrets mentioned above, adjust your scope until the reticle is precisely aligned with your point of impact.
Step 4: Check Your Sight Picture
After adjusting your scope, check to make sure that you have a good sight picture by looking through the scope for any parallax errors or other discrepancies.
Step 5: Fire Again to Confirm the Accuracy
Once you are happy with how everything looks, fire another round to confirm the accuracy of your adjustments.
And there you have it. This is the simplest way to zero your scope. Now you know every crucial aspect of how to adjust a scope on a rifle the proper way. Congratulations!
Tips And Tricks On How To Adjust The Scope On A Rifle
Last but not least, we have listed some pro tips that can help you adjust your scopes precisely every time.
- The process requires patience, so be patient
- Keep your reticle clean and clear
- Make adjustments on the parallax turret while moving your eyes and head.
- Make the necessary adjustments on the parallax until the reticle stops moving.
- Ensure your rifle is loaded with enough bullets when zeroing
- Practice with the same brand of bullets for consistency
- Different types of scopes feature different features, so look into it before buying
- Avoid adjusting the windage and the elevation simultaneously
- Give breaks between shots; this will help regulate the temperature of the rifle
Adjusting a rifle scope can seem intimidating at first, but it can become manageable with practice. Following these tips and steps, you can adjust your rifle scope like a pro!
Adjusting your scope doesn’t need to be a daunting task. With the proper knowledge and understanding of how all the components work together, you can easily adjust your scope like a pro.
Remember to always use caution when adjusting your scope and follow all safety protocols for shooting. Once done correctly, you will be able to hit the target with accuracy!
FAQs
Do You Close an Eye When Looking Down a Scope?
No, you should not close an eye when looking down a scope. Your vision is your most important tool in shooting accurately, and closing one eye will decrease your accuracy by making it harder to acquire the target quickly.
Can You Over-Tighten a Scope?
Yes, you can over-tighten a scope if you use too much force when mounting it. This can cause the scope to become misaligned, resulting in image distortion and inaccurate shots. Always follow the manufacturer’s instructions when mounting or adjusting your scope to avoid this.
What Is a 100-Yard Parallax Setting?
A 100-yard parallax setting is the fixed distance at which the scope will be adjusted to eliminate any parallax. Setting a scope on a 100-yard parallax setting will allow you to stay consistent in your shooting, improving accuracy.
What Is Good Eye Relief for a Scope?
Good eye relief for a scope is typically 3-4 inches. Eye relief is the distance between your eye and the scope’s eyepiece that provides a complete, clear view of the reticle and target. Too little or too much eye relief can cause the scope to be uncomfortable to use and limit your accuracy.


Leave a Comment