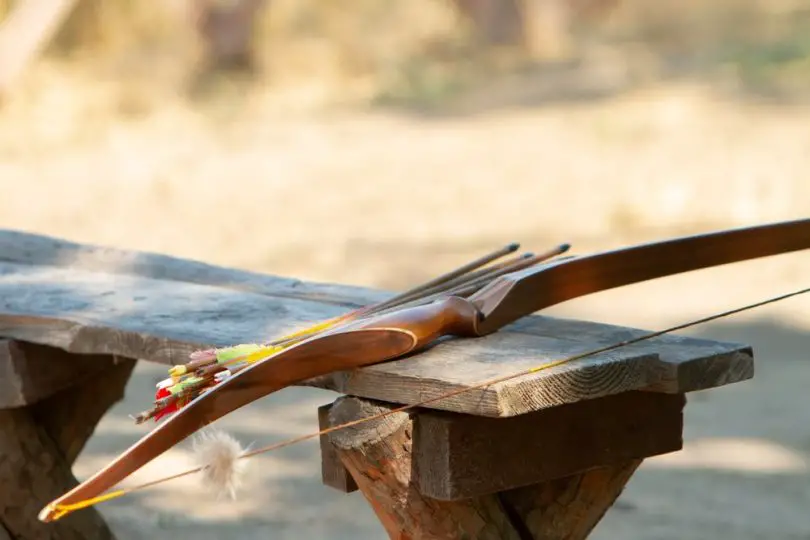
Stringing a recurve bow is an important step in the archery process, as it helps ensure that your bow has the correct tension and draw weight. Although the process is simple, it may appear difficult to inexperienced shooters.
It’s also important for safety reasons, as a loose or improperly strung bow can cause injury to you or those around you. Additionally, If you have a bow that could be disassembled for storage, you should detach the string first. But how do you learn to do that?
You may learn how to appropriately detach and reattach your recurve bow without harming any pieces by visiting your nearby archery store.
But if you prefer to do it yourself, this guide will provide instructions on how to string a recurve bow with or without a stringer. Let’s jump right in!
How to String A Recurve Bow (With A Stringer)
Let’s first look at how to string a recurve bow with a stringer. If you’re just starting out, a stringer will be the best tool for stringing your bow, here’s how it goes:
1. Get a Bow Stringer
This inexpensive item is required for stringing your recurve bow without harming the bow parts.
Choose one that is appropriate for your bow length and pull weight. Check that the stringer’s ends slide tightly over the limb endings of your bow.
2. Wrap the String Around the Bow Tips
Slide the big loop of the string around the top limb of your bow, putting the string on the proper side of your bow.
Insert the small loop through the slot on the bottom limb, making sure it fits securely. If the bow is in a loose position, the string will have a lot of slack.
The bottom limb is on the handle’s heavier end. The pull weight of a bow is generally indicated on the bottom limb.
3. Place the Stringer Pocket on the Bottom Limb End
If the stringer features two pockets, the bigger one should go over your bottom limb. It should enclose the tiny string loop and keep it firmly in the slot. Put a rubber band across the string loop if it does not seem secure.
4. Attach the Saddle or Small Pocket to the Top Limb
If the stringer contains two pockets, place the tiny pocket over the top limb end. Also, place the saddle from one end of the stringer around the upper limb and slightly beneath the string loop.
Now, Place the saddle around 3 inches above the end, directly under the string loop. Certain saddles may be fixed across your bow, while others must be held in place by you.
5. Place The Bow Horizontally
Use your non-dominant arm to hold your bow grip. Hold it straight with your dominant arm near your top limb, securing the loosened string loop.
Place the bowstring and stringer beneath the bow, with both limbs pointing upward.
6. Place Your Foot on the Bow Stringer
Lower the bow by bending at the waist before the stringer reaches the ground. Put both of your feet on it. Use the heels of your feet instead of your arches to keep the string from slipping.
Use one arm to maintain the saddle in position if you use a bow stringer with a saddle. You can also stand on one foot, but placing both feet provides more support. That is especially beneficial for children and shorter people.
7. Draw Up Your Bow
Pick up the gap in the bow stringer and double-check your grip. Be ready to draw upward while bending your bow limbs backward toward the surface.
Pull up against the bow while sliding the loosened string loop upward until it slides into the slot at the top of the bow.
If you’re having difficulty, your stringer could be too large. Make it shorter by tying knots at the lower pouch.
8. Verify if The String Is Safe
To make sure the string loop is firmly in the slot, slide your fingers over it. Keep your fingers on the string for the whole procedure so you can slow down if it begins to fall off.
Lower your bow little by little until the stringer is loose again. Do not speed through this process, since a loose string may break apart and fling limb tips and parts towards your face.
9. Double-Check the String
Turn your bow away from you as soon as possible. Inspect the string loops one more time. If they’re not fixed, repeat the procedure standing on the stringer.
Pull your head away in case that string breaks. Do not direct the limbs towards someone close, as a mishap might result in an accident.
10. Detach The Bow Stringer
Remove the rubber bands that you may use. Tune your bow before shooting for the best performance. Once you’re prepared to unstring your bow, reattach the bow stringer in the same manner as you did before.
Step over the stringer, pull the bow upward, and then slip the top string loop off the slot and downward onto the bow limbs. Once that is done, release the bow gradually.
How to String A Recurve Bow (Without A Stringer)
So, what happens if you don’t have a stringer nearby? Fear not. There are multiple ways you can do it. Here’s how to string a recurve bow without a stringer:
1. Step-Through Technique
The step-through technique is among the most popular methods for stringing your recurve without using a stringer.
This approach includes flexing the bow with your body pressure, enabling optimal string placement. It’s a simple and quick approach that doesn’t require the purchase of a bow stringer.
The first task is to reassemble your bow. Begin by inserting the bottom loop of the string into the slot of your bow’s lower limb.
Then, position the bow out towards you and pass through your bow and string. Put one leg over the bow, and the other leg across the bow. Place the bow over one of your legs’ fronts and the rear of the other leg’s thigh. This is how the technique got its name.
Next, move the bow’s upper limb closer to the string. Move the limb end and string closer and attach them using your weight as leverage.
That’s the most difficult step for most novice archers as you’ll need to create an adequate force to connect your bow and string.
The next step is to examine the bow to confirm that both ends are securely attached.
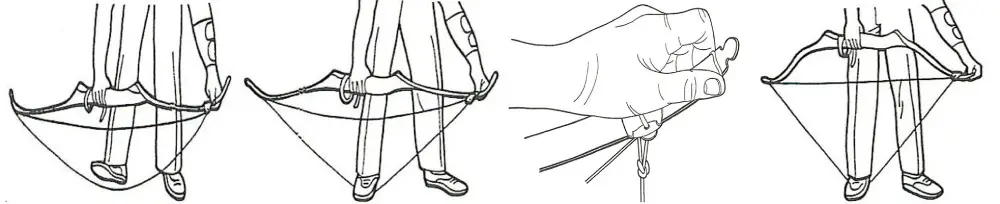
2. Push-Pull Technique
Although it employs the same fundamental idea as the step-through technique, this is typically seen as an easier method to implement.
First, you must assemble your bow by mounting it and getting your string ready.
Begin stringing by inserting the lower loop of your string and ensuring that it is securely attached to the string slot.
Put the bow’s lower point on the ankle of your dominant leg. Be careful not to walk on the bow or lay your body over it. You don’t want to ruin your bow’s tip.
Now, use your dominant arm to grip your bow securely. Put the loop around your thumb and fingers on the exterior of the limb with your other hand’s palm facing out. You may now begin stringing your bow.
Draw back your bow with your dominant arm and push away with your other arm. Move your thumb and fingers up and inside the string slot.
You may also put your right forearm on your hips to create a little extra leverage if you need more strength.
To get the upper string inside the string slot, you’ll need to bend the bow with adequate power.
The next step, like with any other approach, is to examine the bow to confirm the string is firmly attached.
Which Method Should You Use for Stringing Your Bow?
With some training, all stringing techniques are straightforward to learn. If you have the opportunity, choose a bow stringer since it is the most effective method.
Although it does involve the use of extra equipment, it is far safer and will not harm your bow.
It may take several seconds more than the other techniques, but the increased protection and ease of mind are definitely worth the effort.
If you don’t have a bow stringer, then the push-pull technique is your next closest choice. This approach keeps your bow straight and prevents it from twisting. Here’s a video guide of the overall process.
You can also use the step-through technique if you need a bit more technical help. Whatever approach you choose, be sure to practice a lot.
How to String a Recurve Bow: Pro Tips
- When selecting the nocking point, ensure that it is slightly below center. This will prevent the string from slipping off the limb and give you more control over your shots.
- For better protection of your bow, always use a stringer when available, even if it takes more time.
- If you are using any of the approaches listed above, make sure that both ends of your string are securely attached to the limbs before shooting.
- Be sure to practice all techniques thoroughly. You don’t want to make any mistakes while trying to string your bow.
- If you’re using dacron strings, don’t forget to wax them regularly. This will enhance the durability of your stings.
- Finally, ensure that you are using an appropriate brace height. The optimal size will depend on the type of bow and its length.
FAQs
1. How Do I Determine the Correct String Length for a Recurve Bow?
Ans. Before purchasing a string, you should first determine the length of your bow. Measure the distance between the string grooves.
Once you’ve determined the length of your bow, then calculate the length of your bowstring. When shooting a recurve bow, the string is generally 3 to 4 inches smaller than the length of the bow.
2. How Much Time Does It Take To Restring Recurve Bow?
Ans. Restringing a bow takes approximately 15 minutes. If you’ve never strung a bow before, it may take a bit longer. Nevertheless, most archers would quickly master to do this in a matter of minutes.
3. Is Keeping a Bow Strung Bad?
Ans. After you’ve completed shooting, the recommended approach is to unstring your bow. Newer recurve bows are manufactured from synthetic fibers and can be strung for almost three weeks before being stored, but they must be unstrung during long storage.
4. Do I Need to Twist a Bow String?
Ans. Adding twists to the string essentially shortens it, increasing the support height. Removing twists will result in a longer string and, as a result, a lower support height.


Leave a Comment