Achieving precise alignment between the barrel of your firearm and the scope or sights, commonly referred to as bore sighting, holds utmost importance in attaining accurate point of aim and point of impact. This critical step significantly enhances both the accuracy of your shots and the overall safety, especially when you find yourself in the process of mounting a new scope or transitioning to a different caliber or bullet type.
Nevertheless, the conventional method of bore sighting, which entails the utilization of a bore sighter, can impose a substantial financial burden and consume valuable time. These devices, designed to insert into the barrel and project a laser or optical dot onto the target, possess their own share of limitations. The accuracy and reliability of bore sighters can fluctuate depending on the quality and compatibility of the device, leaving room for potential inconsistencies.
The good news is that there exists an alternative technique that empowers you to perform bore sighting without depending on a bore sighter. Armed with nothing more than your own eyes and a few basic tools, you have the ability to save both your hard-earned money and precious time.
Keep reading to learn how to bore sight without a bore sighter.
Step 1: Secure the firearm and remove the bolt
The first step is to safely unload and secure the firearm on a stable surface. Make sure there is no ammunition in the chamber or the magazine, and check the safety mechanism. You can use a gun vise, a sandbag, or any other support that can hold your firearm steady and level.
Now, remove the bolt or action from the firearm, so that you can get a clear view through the barrel. This step may vary depending on the type and model of your firearm, so refer to your owner’s manual for instructions. If you have a semi-automatic rifle or pistol, you may need to remove the entire upper receiver or slide.
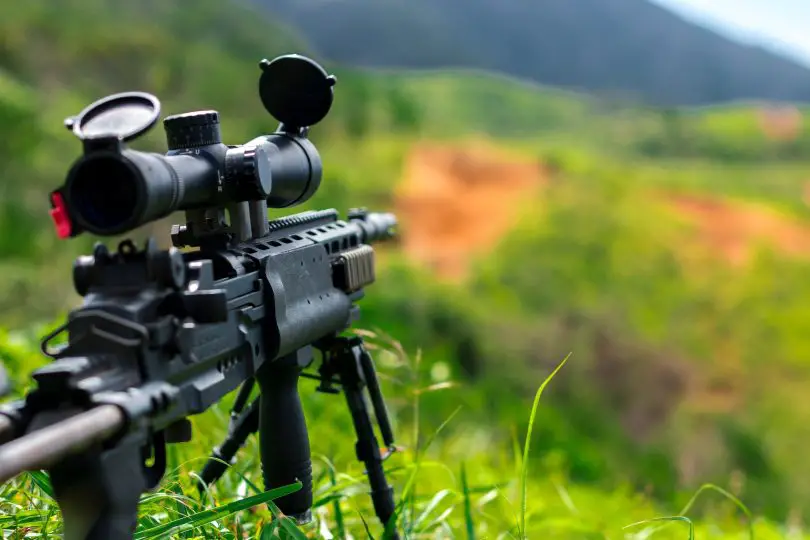
Step 2: Align the barrel with the target
First things first, choose a suitable target at a reasonable distance. A good starting point for most rifles and handguns is around 25 yards. Look for a target that has a clear and distinct center point, like a bullseye, a crosshair, or even a simple dot.
Now comes the fun part. You gotta take a peek through the barrel and adjust the firearm until the target is smack dab in the center. We call this little technique “bore sighting by eye.” To make it happen, position your eye nice and close to the breech end of the barrel, and gaze through it like it’s a fancy telescope. You should see a circular view of that target right through the barrel.
If, by chance, the target isn’t perfectly centered in the bore, it’s time to make some adjustments. You might need to move the firearm a bit to the left or right, up or down, until it lines up just right. Get creative with your support and consider using shims to fine-tune that alignment. Oh, and one important note: once you’ve got that alignment on point, make sure you resist the urge to touch or move the firearm. Keep it locked in position, my friend.
Step 3: Adjust the scope or sights
The third step is to look through the scope or sights and compare the point of aim with the point of view through the barrel. The point of aim is where the crosshairs or sights are pointing at on the target. The point of view through the barrel is where the target is centered in the bore.
Ideally, these two points should match exactly. However, in most cases, they will be slightly off. This means that your scope or sights are not zeroed in with your barrel, and you need to adjust them accordingly.
To adjust your scope or sights, you need to use the windage and elevation knobs that are located on your scope or sights. The windage knob controls the horizontal movement of your point of aim, while the elevation knob controls the vertical movement.
The direction and amount of adjustment you need to make depend on how far off your point of aim is from your point of view through the barrel. For example, if your point of aim is too high and too right compared to your point of view through the barrel, you need to turn your windage knob left and your elevation knob down.
The number of clicks you need to turn each knob also depend on how much each click changes your point of aim. This is usually indicated on your scope or sights as MOA (minutes of angle) or MRAD (milliradians). For example, if one click equals 1/4 MOA, and your point of aim is 2 inches off at 25 yards, you need to turn 8 clicks (2 inches / 1/4 inch per MOA).
You may need to repeat this process several times until your point of aim matches your point of view through the barrel as closely as possible.
Step 4: Test fire and fine-tune
Ah, my friend, here we stand at the precipice of the fourth and final step—a moment that holds the weight of truth. It is time to test fire your firearm and diligently observe the point of impact. In this very moment, the essence of your efforts shall reveal itself. This is where the rubber truly meets the road, where your bullet gracefully finds its destined mark. And through this vital step, we shall confirm whether your dedicated bore sighting endeavors have borne fruit.
Before we proceed, allow me to impart a gentle reminder. As you reassemble your firearm and proceed to load it with live ammunition, I implore you to remain acutely mindful of safety. Let it reign supreme in your actions, dear friend. Respect and diligently adhere to all the safety rules and precautions that accompany the handling of these live rounds. And as you embark on this next phase, kindly ensure your eyes and ears find solace behind the protective embrace of gear. We want your shooting experience to remain secure and free from harm’s reach.
Yet, before we let loose those shots upon the world, let us momentarily halt and ensure that your firearm retains its alignment with the target. Cast your gaze back to the achievement of step 2, my friend. And if, by some small chance, you perceive even the faintest hint of misalignment, be not dismayed. For in that fleeting moment, restore the delicate harmony of alignment without disturbing the grace of your scope or sights. Our pursuit remains anchored in precision, after all.
Now, my friend, you are primed to embark on the test fire itself. Take aim at the target’s center point, and with a gentle squeeze, release a minimum of three shots, focusing on maintaining a consistent approach with each pull of the trigger. We seek not only accuracy but also the unwavering commitment to replicable results.
Once you’ve completed your shooting session, direct your attention to the point of impact created by your shots. To gain clarity, mark these impressions directly on the target or, if needed, employ the aid of binoculars or a spotting scope. It is within these marks that the truth will reveal itself.
Now, if your point of impact aligns harmoniously with your intended point of aim, allow me to extend my heartfelt congratulations! You have flawlessly executed bore sighting without the reliance on any specialized equipment. Your firearm now rests precisely zeroed in at 25 yards, offering you the gift of accuracy and the confidence to embark on your shooting endeavors.
However, should your point of impact veer from its intended destination, fret not, my friend. There remains the opportunity for fine-tuning. You might need to make further adjustments to your scope or sights, or perhaps explore the process of verifying zero at varying distances. Understand, bore sighting by eye is not an exact science; external factors such as bullet drop, wind drift, or parallax can influence your accuracy.
To initiate these refined adjustments, you must embark on a humble repetition of steps 3 and 4 until your point of impact harmoniously converges with your point of aim at 25 yards. Once this feat is accomplished, you can then proceed to verify zero at different distances, tailored to your personal preferences and intended purposes. Whether it’s 50 yards, 100 yards, or beyond, repeat steps 2, 3, and 4 at each distance, making minor adjustments as required.
And so, my friend, armed with patience and determination, you march onward. With each shot fired and each minute adjustment made, you refine the accuracy of your firearm to an exquisite level. Embrace this process, savor the journey, and may your every shot find its way unerringly to the bullseye.
Final Thoughts
Learning how to bore sight without a bore sighter is a simple process. A method both simple and effective, it holds the power to elevate your accuracy and safety when you step into the realm of shooting. But that’s not all, my friend. This technique can also save you both your precious money and time when compared to the use of a bore sighter device.
Indeed, by embracing this alternative approach, you unlock a gateway to enhanced precision, fortified safety, and unburdened pockets. No longer bound by the shackles of traditional bore sighters, you can revel in the knowledge that your shooting endeavors shall thrive while sparing your precious resources.


Leave a Comment