Knives are necessary for our daily food preparations, from buttering toasts to slicing through delicious roasts, and also in sports such as throwing knives.
A question we get asked most often is how to sharpen a knife with an electric sharpener. And today’s blog will explore just that!
Whether it’s a kitchen knife, hunting knife, or knife used in competitive sports, it’s crucial to keep your knives sharp enough. A sharp knife is far less dangerous than a dull knife.
As with any instrument with continuous use, these knives will start getting a little blunt. The best way to sharpen a knife is to use an electric sharper.
This article outlines how to use an electric knife sharpener safely, get the best performance from your knife, and keep them sharp for longer. Let’s jump right in!
How to Use Electric Knife Sharpener: Precautions
As I’ve mentioned before, a blunt knife is potentially more dangerous than a sharp one, especially in the kitchen! With dull knives, you’ll need to apply more pressure to cut through fibrous, soft items like meat.
While doing so, chances are that the knife slips. So all the pressure you put on your knife may cause serious trouble. In fact, blunt knives are responsible for the majority of kitchen accidents across the globe!
Most of us have been victims of these at least once, right? That’s why keeping sharping stones, honing rods, or electric sharpeners is always a good idea.
Whether you’re a home cook who keeps the knives at home, a hunter who carries the knives on hunting trips, or an athlete who uses throwing knives to hit targets, life without knives isn’t the same.
Now that you know the importance of a knife sharpener, it’s time to explore the sharpening process. Here’s what you’ll need to do.
1. Getting Familiar with the Machine
Take a good look at the machine and get the user manual. Find the page containing the diagram listing (where the parts and buttons are illustrated).
Be aware of different color lights and what they mean. The on/off button should always be on the side that faces the user.
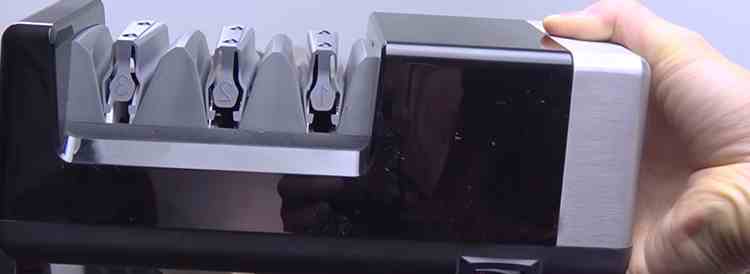
Also, Identify the various sharpening degrees on the sharpening wheel. The sharpening regiment starts from the left side and works through to the right.
There should be coarse and fine slots, sometimes extra fine. Or it might be labeled as stages 1, 2, and 3. Each level will have two sharpening slots to it.
This is because the sharpener only sharpens one edge of the blade at a time, so you have to pass the knife through the left side first and then the right. Make sure to pull the blade an equal number of times on both sides at every level.
Some sharpeners have cross wheels for the Stage 3 or Extra Fine stage that sharpen both sides at once. It all depends on the make and model of the electric knife sharpener.
2. Understanding How the Sharping Slots Work
You might have a very reliable electric knife sharpener. But this step is critical to learning how to use an electric knife sharpener. It’ll ease the technical part, so you can get there real fast. Let’s dive in!
Stage 1
The actual job of sharpening starts at this stage. Knives that are really blunt or need to be a little edgier can be sharpened using this level.
Don’t overdo the action on the blade because by doing so, you’ll be hurting the edge quite a bit.
If the knife has been used repeatedly for more than 2 to 3 weeks and is quite blunt, it’s the stage you want to start with.
Stage 2
Now, you’ll need to hone the blade further. This stage is used to sharpen the blade lightly and smoothen it.
It will give the knife a sharp edge and tone it up a bit. This is where you can start if you have used the knife for more than a week without sharpening it.
Stage 3
This stage involves polishing the knife blade so the micro-burrs on the blade can be cleaned up and make the blade “razor sharp.”
To keep your knives with precise edges even with frequent uses, you’ll need to use this stage every 3 to 4 days. This is the way to go if you like to sharpen your knife as frequently as possible.
Stage 3 may be great for quick use. If you still find the knife a bit dull, try stage 2 before putting it through stage 1.
How to Use an Electric Knife Sharpener: Step-by-Step

That’s enough chit chat. It’s time to sharpen your blades. Let’s explore a step-by-step process on how to use an electric knife sharpener:
Step 1: Turn the Sharpener On
Identify the ‘On’ button (probably located on the side of the device that faces toward you).
Get the knife/knives ready for the job. Always check the manufacturer’s recommendation for sharpening instructions, as different types come with different requirements. This usually depends on the blade’s grind (the shape of the blade’s edge).
Make sure the wall socket is set to off, plug the device in with dry hands, and switch the wall socket on.
With the on/off button facing you, turn the electric knife sharpener on.
There should be a low buzz or humming noise coming from the machine, and it should be gently vibrating.
Step 2: Slide the Blade Through
The next step is to determine the bluntness of your blade.
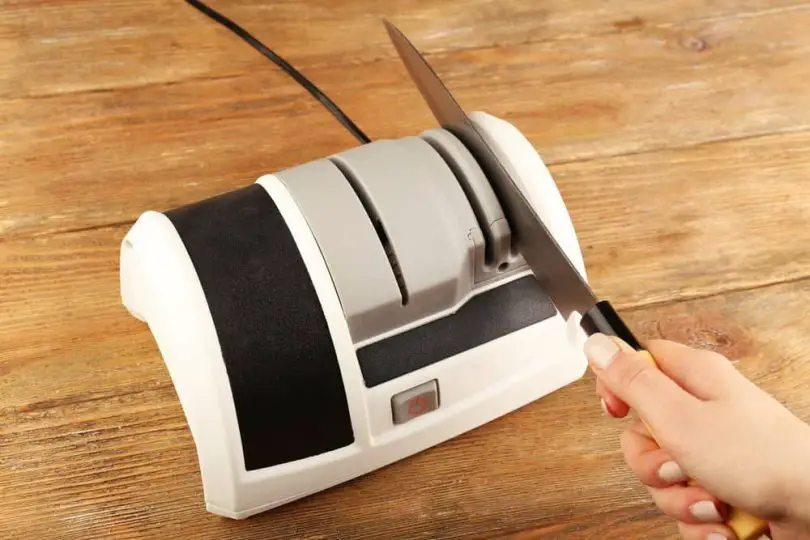
Once you have determined that, lower it onto the center of the Stage 1 grinder to the hilt of the base with the tip sticking out the other end. There with be a grinding noise when the blade is positioned correctly.
Then smoothly, without rushing or forcing it, just let it move. Pull the knife back towards you, tilting it upwards to the shape of the blade to ensure you get it sharpened to the utensils grind.
Depending on the bluntness of the knife, it should be repeated twice on both sides of the Stage 1 sharpener.
It is important that the knife is pulled through an equal amount of times on both sides of the stage one sharpening wheel to ensure a sharp edge.
Step 3: Run a Test
You should always test the sharpness of your knife after sharpening it. Dull knives are more dangerous in the kitchen. So, sharpen them regularly.
When the knife gets sharpened, the metal is being removed from the blade. As a result, you’ll actually be able to feel the difference once the process is over.
They are called “the burr.” If you run your fingers gently up and over the bottom side edge, the side not yet sharpened, you will feel them. Take caution, and do not run your finger near or close to the cutting edge.
Once you have run the blade through to sharpen the left side, you’ll need to run it through the right side of the Stage one grinder for an even sharpness on both sides.
Repeat this process at least twice during this grinding stage.
Step 4: Test Again
It’s always better to double-check everything when it comes to dealing with sharp objects like kitchen/hunting knives. Especially after you finish sharpening your blades.
Some of you might wonder, “Are electric knife sharpeners good?” Well, this is your chance to reevaluate the machine. Test your knife. You can use paper, rope, leather, and other materials to test your knife’s sharpness.
Also, try to feel the burs. Most, if not all of them should have smoothed out. If not, run your knife through the machine for a couple more turns. This should leave you with razor-sharp blades that can cut almost anything!
Step 5: Cleaning
Once the knife has been sharpened, it is imperative to remove any leftover filings, as you do not want them transferred into your home.
Remember, these filings may be tiny, but they’re still metal shards, which can create a bunch of complications. Vacuum the filings to clean the area up. You can also use a magnet. If the knife you’re using gets attracted to the magnet, so will the metal shards.
Rinse the knife from tip to hilt in warm soapy water, rinse off with clean water, and thoroughly dry it before use.
This will give you a super sharp hunting/kitchen knife ready to take on almost anything!
How About The Remaining Slot(s)?
Since we’re still in the process of making the best out of your electric knife sharpeners, you should try the other slots as well. Here’s what the other 2 slots can do:
Fine Grinding Sharpening/Stage 2 Grinding
Once you have run the knife through the first/coarse grinding stage, you need to run the knife onto the second/fine grinding stage. This should also be repeated twice on each side of the blade.
Stage 3/Ultra Fine/Polishing/Smoothing Phase
Once you have run the blade through stages 1 – 2 for an even better precision cutting and shaper blade, run it through the extra/ultra-fine grinding wheel, sometimes known as stage 3.
This will provide a smooth finish and help you sharpen your knife even more.
Using Electric Knife Sharpeners: Pro Tips
When using the machine and sharpening knives
- Never switch the device on or work it with wet hands
- Always ensure the device on/off button is turned towards you, the user
- Hold the knife pointed away from the body at all times
- Use fluid, smooth movements when pulling the knife through the machine
- Follow all instructions, safety precautions, and manuals for use carefully
- Keep the electric knife sharpener away from children
- Keep sharp knives away from children at all times
Now that you know how to sharpen your knife using an electric knife sharpener, you’ll need to be attentive to the user manual. Following the instructions will help you to avoid unfortunate accidents.
Remember, you aren’t working with a whetstone or a manual sharpener that significantly differs from an electric one. So, understanding how the machine works to optimize its usefulness.


Leave a Comment