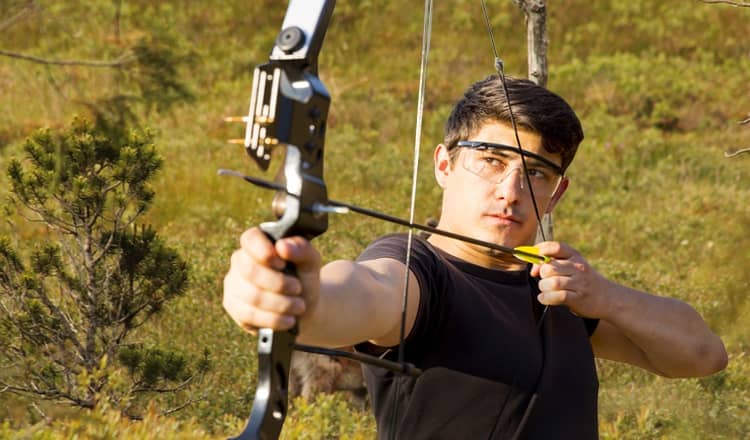
Shooting a compound bow is a thrilling and rewarding experience, whether you’re using it for hunting, target shooting, or just for fun. However, it can be a bit intimidating for beginners who are not familiar with the proper technique and form.
Shooting a compound bow requires a combination of physical strength, mental focus, and technical skill. With the right guidance and enough practice sessions, anyone can learn to shoot a bow accurately and confidently.
In this guide, we will walk you through the basic steps of how to shoot a compound bow and arrow, from proper stance and setup to aiming and release. We’ll cover all the essential techniques you need to know to shoot effectively including consistent anchor points, bow grip, and follow-through.
Whether you’re a novice archer or a seasoned pro, this guide will provide you with the knowledge and skills you need to improve your compound bow accuracy. So, let’s get started and learn how to shoot a compound bow!
How to Shoot a Compound Bow: The Basics
I won’t say it’s easy or doable overnight. Even a celebrated archer would unfold a story of failures if you asked how compound bow shooting had gone through for him/her.
But the process is neither intimidating nor annoyingly complicated. All it takes is your commitment that you’ll follow the rules, have some patience, and respect for the undertaking.
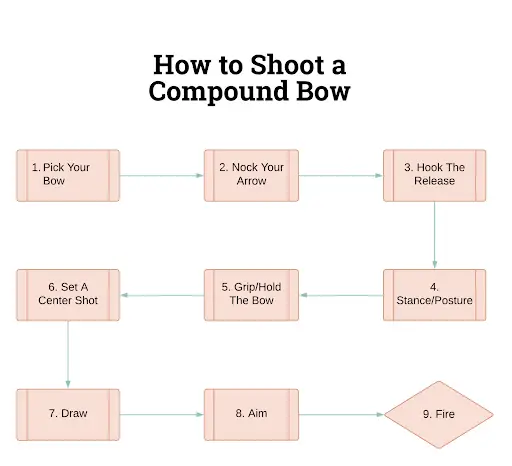
To help you know all about shooting a compound bow in a mere minute, I’ve presented an action flow chart. Let’s have a look:
Pick the Right Bow
Choosing a suitable compound is critical to your labor for shooting a compound bow accurately. Making the right choice isn’t explicable in a word or two. However, here’re a few essential points to consider.
- Keep in mind that you want a bow that gets you a higher proportion of energy to what you put in.
- Beginners can achieve some accuracy with a long, heavy, and slow bow while experts do wonder with relatively short, light, and fast ones.
- The most expensive bows aren’t always suitable for you! Look for an inexpensive option if you don’t fancy a little lighter, speedier, and cuter bow.
- Study the cam and limb carefully for an appropriate choice.
- Try to identify one that delivers optimal downrange accuracy and quiet shots.
It isn’t surprising if you want to dive deep into your choice. Well, read another article that explains the buying considerations and offers some worthy suggestions.
Attach (Nock) an Arrow to Your Bowstring
![]()
A nock refers to the part/point snapped onto an arrow’s bowstring. Nocking won’t test your patience, promise!
- Put your arrow on/through the rest.
- Rotate the arrow to cause its colored vein to face upward.
- Press the nock with some pressure onto the bowstring in the middle of the string loop as long as it takes you to hear a click.
The usual types of rest allow the arrow to sit atop them. Avid archers usually prefer a biscuit arrow rest because it allows an arrow to slide through its bristles and get positioned while not causing the archer any worry about having the arrow fall off the rest.
Check the following to be sure you have made a right nock.
- If the vain (the one not very colorized) faces upward
- The arrow stays on the rest
- You got a ‘clicking’ sound as the nock clicks onto the bowstring
Hook the Release
The release is what helps you avoid accidental bow discharge and keep the fingers safe from wear and injuries. If you have a wrist strap aid (a nice choice for beginners), here’s how you hook it.
- Attach the release to your hand (the one that you feel is more dominant).
- Use the Velcro straps.
- Make sure the clamp’s mouth stays around the bowstring’s loop.
- After drawing the bow, the archer simply punches the trigger to release.
- Punching the trigger will discharge your bow with the release attached.
Some Popular Release Styles
- You may choose a particular release aid that should be hooked to the D-loop requiring you to place your hand on the aid.
- If you have a handheld release, you need to use some muscular strength or thumbs to trigger it.
Cautions to Remember
- Try to keep your hands back flat and stable with a little tension in the fingers so that you don’t lose the release.
- Make sure your hands are on a particular spot of the release, and it stays the same until the shot is taken.
- With some specific aids, you may need to lock your release in place. Also, the type of your aids determines the time when you have to lock that (after/before hooking the release onto the D-Loop).
- Take care of your thumb/index finger by keeping it at a distance from the trigger as long as you need to draw your bow back completely and start aiming. Forgetting this might be responsible for a thumb being injured by the trigger by chance as you draw a bow.
Align the Bow with the Bowstring (For a Center Shot)
For a powerful shot, you have to place an arrow right in the center point of the string’s power stroke. Be sure to have the arrow placed right in front of the bowstring as you move the string forward straight. This is the way you have to align the bowstring and bow.
In addition, make sure the string comes in an alignment with the bow riser center and limbs. Thus, you can be sure you have been able to set the center shot.
Grip (Hold) the Bow
How you position your hand (the one holding the bow) on your bow grip is crucial to the way an arrow flies, and thus, your overall shooting performance. Follow the instruction below for a perfect grip.
Place the portion of your palm located between the lifeline and thumb right in the midpoint of the bow grip. Do you know what this region of your palm is known as? It’s a pressure point that seriously matters as you grip the bow.
Like any experienced bow hunter, I would recommend you to have a relaxed grip maintaining a little tension. Such a grip should guide the thumb point toward your target while the knuckles of others will stay angled at 45 degrees to the bow.
Some people mistakenly grab and hold the bow too tightly, and thus allow tension on the grip, which eventually causes left/right arrows. Try to set the grip without changes, so you can avert the risks of a shot that might go left/right or high/low.
Perfect Your Standing Posture (Stance)
Your standing posture plays a crucial role. The stronger your stance is, the more likely you are to succedd. So, here’re some basic rules of making your posture right.
- Stand tall with a flat back. This position is helpful when the atmosphere is windy, or you’re pursuing the game from a tree stand. Moreover, you can utilize the stronger and more useful back muscles.
- Keep your neck and shoulders relaxed. Make sure the shoulders stay low and the blades lay down. If you can’t have the shoulders relaxed, inhale deeply through the belly and exhale slowly while letting the shoulders drop.
- Keep your head toward a neutral position and straight at your target. Try to choose an appropriate archery target that helps with your particular physical standing.
Experts’ Recommendations on Posture
While the above tips just teach you the basics, the following ones are meant for helping you achieve the best posture for compound bow hunting.
- Keeping the body at a 180° line with the ceiling. Aerobics exercises or yoga might help here.
- Engage the body’s lower core.
- Keep the waist level with the feet.
- Try to ensure that the body’s weight distributes evenly on your feet.
- Try to feel the exact point of your feet wherein the weight mostly exists so that you can deal with troubles of tilting the head, rocking ahead, or leaning back.
- Make yourself stand in a position that allows you to let 60% of the body’s weight stay on the balls of the feet and 40% on the heels.
- Left-handed people will have the right foot on the lead facing the target’s right side.
- Try not to move so much as even the tiniest of movement can cause the arrow to miss it’s target
So, you already have read the rules of stance which is a very significant part of your compound bow shooting training. Now, you’ll be learning how to draw a compound bow.
Draw Your Bow

As you’re going to pull (draw) the string back, you’re just three steps away from the proper way to shoot a compound bow. ‘Draw’, ‘Aim’, and ‘Shoot’: These are the ultimate steps where you need to maintain consistency more attentively than ever.
- Use the extended arm to draw your bow back. The extended arm helps you smoothen your motion.
- Try to draw the bow back in a flawless motion with the arm (that holds the bow) always directly toward the target, maintaining a straight shooting line.
- With the body positioned properly, rotate the shoulder backward when you draw back. It will add to your drawing power.
- For more drawing power, you can push your bow slightly forward when you draw it as well. However, I don’t recommend this to a beginner.
- Keep your bow arm, hips and feet stable while drawing.
- Don’t move your bow around while drawing back.
- You might slightly move forward, but avoid pointing your bow up/down while drawing back.
- Finally, you need to consider the arrow on your bow as a loaded gun that typically points at the target.
Understanding Draw Weight and Length
As you can draw and shoot a compound bow to and from a certain point only (typically known as a full draw), you must have a bow that fits you properly. But, how would you be sure that you’ve the right bow in terms of suitability?
The answer is, learn how to measure your draw length and weight. Let’s get some insights into these measurements.
How to Measure Draw Length on a Bow?
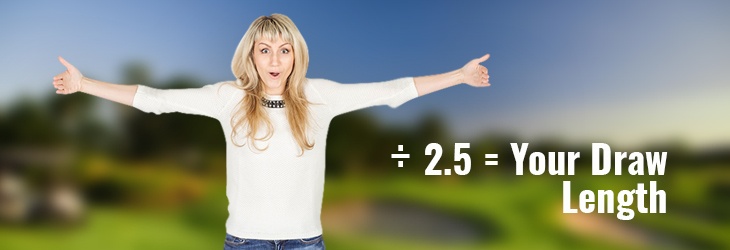
Draw length refers to the distance between the centerline of the bow handle and the drawing hand. This is how you measure draw length:
- Stretch both arms wide open.
- Take the measurement from one hand to another in inches, capturing the shoulder width as well. The result should equal your height.
- If your arm span happens to exceed your height in inches which is typically called Ape Index, you should also measure your arms.
- Now, divide the measurement by 2.5, and the result will be your actual draw length.
Now that you’ve got your draw length, you need to understand what the bow is fixed for.
- If you have a scrunched body as you draw your bow back, the draw length isn’t up to the mark (too short).
- Do you find it difficult to get the bowstring fully back or hold that there? If you do, you’ve got a huge draw length.
How to Calculate Draw Weight?
The amount of energy or force you need to pull the string of your bow is the draw weight. Your preference and physical strength matter in the calculation of draw weight. Take a look at the basics.
- For men, the draw weight should be anywhere between 40 to 70 pounds and the range is 30-50 pounds for women. For kids, it should be between 15-30 lbs. and for you, if a bowhunter, it should be 65-80 lbs.
- The lower the draw weight, the easier it becomes to attain steadiness. On the contrary, higher draw weights tend to reach an increased arrow velocity. You have to practice a lot to benefit from this balancing act.
However, you can move on to the actual shooting game if you can pull the bowstring back considerably well while maintaining a full-draw stance comfortably.
Understanding the “Let-Off” Point
While using your compound bow for hunting a big game or something similar, you want to get more time and concentration on aiming. Here, you have to understand the let-off point that lets you hold a relatively smaller amount of draw weight.
Let’s assume that your compound bow features 100 lbs. in draw weight. So, you’re likely to draw the bowstring at around 100 lbs. which is the peak weight. While forcing through the draw, you’ll reach the let-off mark at some point.
Consequently, the draw should feel easier and more flexible at around 65-75% of the actual weight. Then, you can hold a smaller amount of weight which is typically around 25 lbs. till the release of the arrow.
Setting Your Anchor
You draw your bow back to a certain spot of your upper body. That’s the anchor point. It can be the thumb touching the ear, or the knuckles touching the cheek.
Be careful about finding the point because you’ll be hitting it while drawing your bow back every time. However, you may do it like the following.
- Place one hand with the bow release on the cheek/jaw. It’s your first anchor point.
- The string should touch your nose tip. It’s your second anchor point.
You can move the hand around to look beyond the peep sight and press it flexibly against the face.
Aim Correctly
The ‘aiming’ process should start with the identification of the dominant eye and adjustment for the peep sight. Let’s get into the two factors.
Determine Your Ocular Dominance
The human brain prefers one eye over another in terms of visual input. The input of the preferred eye tends to be more practical. If you aren’t sure which one is your dominant eye, find it out the following way.
- Keep your hands at your arm’s length.
- Make a triangular opening with the forefingers and thumbs by pressing them together.
- Open your eyes and try to look through your finger triangle.
- Then, center the triangle on a very small, round object or a doorknob.
- Close your eyes one after another.
- Chances are that you fail to close one eye through blinking. Call your buddy/neighbor to cover the eye with something gentle.
If one of your eyes keeps the small thing/doorknob quite centered in your triangle, that’s your dominant eye. With a dominant right eye, you should shoot with the right hand, and a dominant left eye requires left-handed shooting.
Adjusting Your Ocular Position for the Peep Sights
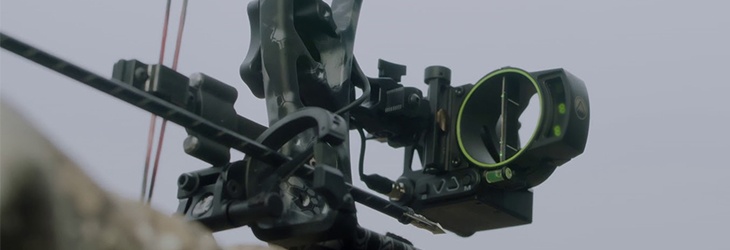
Your compound bow has a sight system comprising two parts, such as the forward sight and the peep sight. The forward sight includes a level and a series of pins, all located at the bow front. The peep sight on the bowstring adjusts to the eye as you draw the string.
A peep sight allows you to have a clear/uninterrupted line of sight between your eye, pin, and target. A rear peep sight is what I suggest to everyone who wishes to maximize their bow sight.
The idea of perfecting the alignment of a peep sight varies from archer to archer since the anchor points and face sizes do vary from person to person.
So, the key to perfect your peep sight alignment requires you to find a relaxed anchor point at first. Then, you can use the sight’s helper to move your peep up/down the bowstring. Keep moving as long as you need to see your bow sight clearly through the peep.
So, you’ve been happy to discover your dominant eye and look through the peep sight. Now, be ready to aim.
- Line up your target with the pin. Look below to choose the right pin for your needs. There’s a pin for every specified distance, such as a pin for 20/30/40 yards.
- Look through the available peep sight with your dominant eye.
- Shut the other eye. You may keep it open if you feel it’s easy.
- Forward sights typically have a bubble that has to be in the center of the sight’s level. If you see otherwise, you can tilt your bow left/right until the bubble comes to the center.
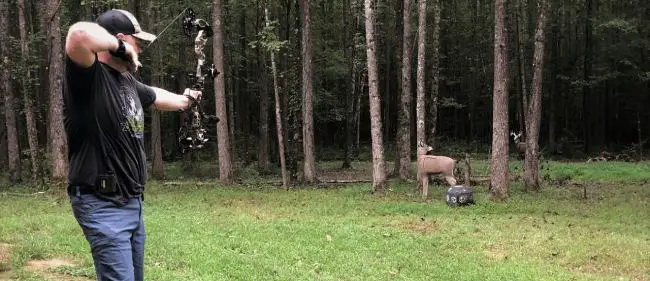
Take the Shot
This is the most crucial moment as you gather all your concentration on the target, and release. Here are some pro tips that can help you get better at it over time:
- Release the string.
- Send your arrow right toward the target.
- Allow your finger to pull the trigger back smoothly.
- You may continue to move your hands back comfortably long after releasing the trigger to avoid hurting the motion.
It’s okay to feel some shocks as you’re just starting out.
So easy as it seems, right? Yes, it is, but…
- Avoid keeping muscles tense and tight and any jerky movement.
- Have your chin up and shoulders relaxed.
- Keep your knee slightly bent.
How Do I Make My Shots Accurate and Consistent?
Here comes the necessity of follow-through, one of the rules of thumb in archery for beginners that can make you an adroit compound bow hunter.
Don’t lose your aim and lower your bow even after the arrow has hit the target. Keep watching on the arrow (as it hits) while holding the bow steadily for at least 3-4 seconds.
Practicing Your Stance
Though you already have mastered the art of standing posture, keep the following things in practice.
- Avoid keeping muscles tense and tight and any jerky movement.
- Have your chin up and shoulders relaxed.
- Keep your knee slightly bent.
Compound Bow Shooting Safety
Don’t ever underestimate the force of a compound bow. Follow these rules of safety to avoid an unwanted misfire and getting someone/something pierced to injury or death.
- Hold your bow loosely at the side without a nocked arrow.
- Never draw your bow if you aren’t about to shoot.
- Choose an archery target that absorbs the arrow’s energy.
- Don’t stick a target to a brick wall because you risk being injured from shattered graphite in case you miss the target.
Reasons You Can’t Shoot a Compound Bow Accurately
At this point, I can expect you’ve got how to properly shoot a compound bow like a regular archer. But you still have the chance to miss your shots more often than not. Here’re the reasons.
- If you hold some of your shots for too long, you might perform with sheer inaccuracy and inconsistency. So, try to pull off a quick yet accurate shot.
- Draw a small dot on your own or get one from the market to aim because aiming and hitting a small target will help you to take an accurate shot with practice and time.
- Choose a well-designed bow that features a backstop (The point that prevents you from pulling a bow back anymore). Also, keep the torque of your bow in regular checks, so it doesn’t become the cause of your shooting inconsistencies when you’ve done everything right.
- Don’t count on inaccurate yardage. Use a high-quality archery rangefinder with a precision lens for the right yardage information.
- Pick the right archery arrows that come with equal weight.
- Keep the bow and arrow clean and free of dirt and debris.
Too much information! A huge learning curve! I don’t blame you if these are your thoughts after you learn to shoot a compound bow.
But, the job will soon become a joy if you can keep the education in mind and keep things in place. Regular practice and adherence to the dos and don’ts will make you a skilled compound bow hunter who can tout their archery skills fearlessly!
And the game of hunting? I bet you can make it a glorious pursuit that forms a sense of fulfillment and virtuosity throughout the rest of your life.
FAQs
1. Is a compound bow easy to shoot?
Ans. Yes. Compound bows are comparatively easier to draw, aim, and shoot. As these bows use a system of pulleys, cams, and cables to reduce the amount of force needed for a full draw. It can provide a massive let-off of up to 90%.
2. How long can a compound bow shoot?
Ans. In general, most compound bows can shoot 30-60 yards. However, Some high-quality modern bows can shoot arrows up to a massive distance of 400 yards, exceeding the speed of 200 mph.
3. How powerful can a compound bow be?
Ans. How much power a bow can hold is determined by its draw weight. The higher the draw weight of a bow is, the more powerful that bow will become. In general, most adult compound bows range from 30-90 lbs.
4. How fast can a bow shoot?
Ans. Most modern compound bows can shoot arrows at a speed that ranges from 250-350 fps, with some advanced models can reach up to 400 fps or even more. However, the speed largely depends on the type of equipment used, and the skill/strength of the archer.
5. Are all compound bows adjustable?
Ans. Yes. Most compound bows are adjustable to some extent. However, the level of adjustability may vary depending on the specific model and brand. If you’re a beginner, stick to the manufacturer’s instructions or seek professional guidance before making any adjustments to your compound bow.


Leave a Comment