
The crossbow was invented in ancient China by Chin Chu around 700 BC.
Known as the gastraphetes in ancient Greece, the crossbow crossed its way into Europe. As a weapon, the crossbow is made up of a bow attached crosswise on a stock of wood.
Bolts are also known as quarrels. They are the projectiles you shoot from your crossbow. They come in various sizes, traditional arrows being longer than the others.
The bow of a crossbow is made from wood, iron, or steel. Their chief use was in medieval wars and hunting.
Nowadays, it is in use as a sports weapon and for hunting. Do remember, a crossbow is not a toy. It is a deadly piece of weaponry.
Today, we’re exploring the process of making a crossbow bolt by hand. We’ll also explore the different parts of a crossbow bolt and the differences between a bolt and an arrow.
Let’s dive deep into exploring how to make crossbow bolts from scratch!
What is the Difference Between Arrows vs Bolts?
Let’s get a bit acquainted with the various parts and terminology first.
Some people call a crossbow projectile a bolt, while others refer to them as arrows.
Originally, bolts and arrows meant different things. Bolts were usually smaller and made from a variety of materials. They didn’t feature stabilizing fins.
Arrows, on the other hand, were longer, more straightforward, and came with stabilizing fins.
However, as modern-day crossbows are becoming more and more incorporated into competitive archery, most people started referring to them as arrows.
As a matter of speaking, when someone refers to bolts and arrows, they are talking about the same thing. In this article, we will stick to the arrow for simplicity.
Let’s get started:
Different Parts of a Bolt and Specs
Crossbow arrows are mostly 16″ to 22″ in length, with an average of 20 inches.
It’s better to stick with the recommended arrow length when it comes to buying/crafting new arrows. If the arrow is too short, the tip can create issues with the crossbow rail, the groove where you load your arrow.
Here are the key parts of a crossbow arrow you need to know about:
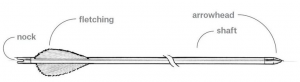
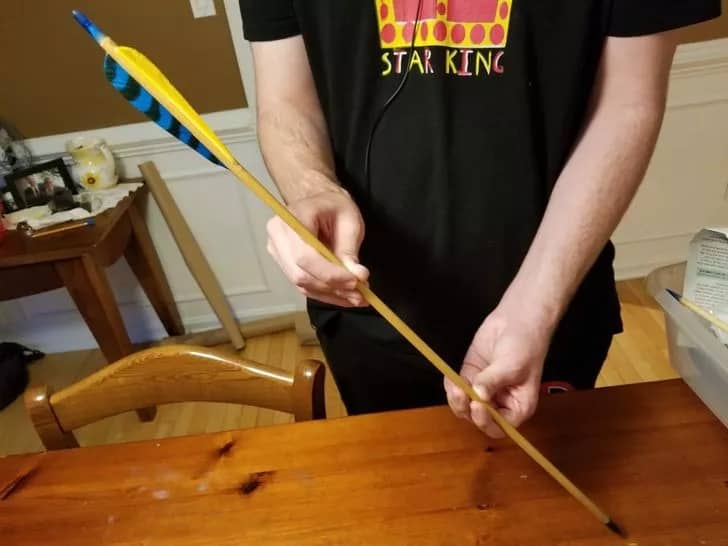
The Shaft
The bolt shafts are the backbone of an arrow. All the other elements mentioned below are attached to it. They are made of aluminium or carbon. They are lightweight, splinter-proof, and resistant to bending.
The stiffness of the shaft is alluded to as the ‘spine’. The more resistance to bending, the greater the ‘spine’.
The Nock
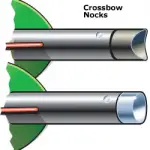
Derived from plastic or aluminium mostly, the nock is hitched to the back of the shaft. Its function is to maintain the bolt in place as the shot is lined up.
Nocks are of two primary types; half-moon (top image) and flat nock (bottom image).
The half-moon nock is grooved where the flat nock is, just as the name suggests, flat. It’s imperative to align the groove and the string is essential before you take the shot.
Fletchings
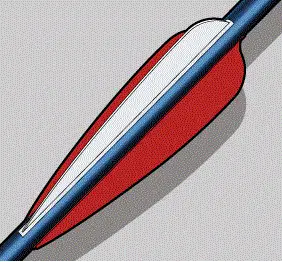
Fletchings are tiny wings located at the back of the shaft adjacent to the nock.
They stabilize the trajectory of the bolt mid-flight and keep it travelling in the proper direction.
Pitching or swaying to any side is also eliminated. A slight spin is transmitted coaxially by the fletchings increasing flight stability.
Most high-quality bolts have 3 fletchings made of a form of durable plastic, and they are also referred to as vanes.
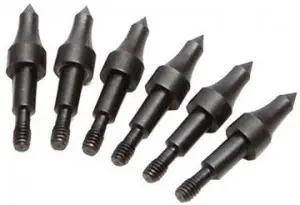
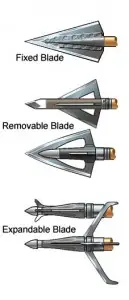
Field Points Broad-Heads
How to Make Crossbow Bolts: A Step-By-Step Guide
Things You’ll Need
- Wooden shaft ($35-$50 for a dozen). Cutting your own shafts can be slippery, as the slightest imperfection will throw your shot off, and DIY is time-consuming.
- Nocks at about $10 per dozen
- Glue, preferably Superglue
- Glue-on point
- Glue on nock
- Fletching (feathers) pre-cut. Turkey feathers are ideal and come for $15 per dozen
- Tip/nock sharpener
- Scissors
- Sandpaper
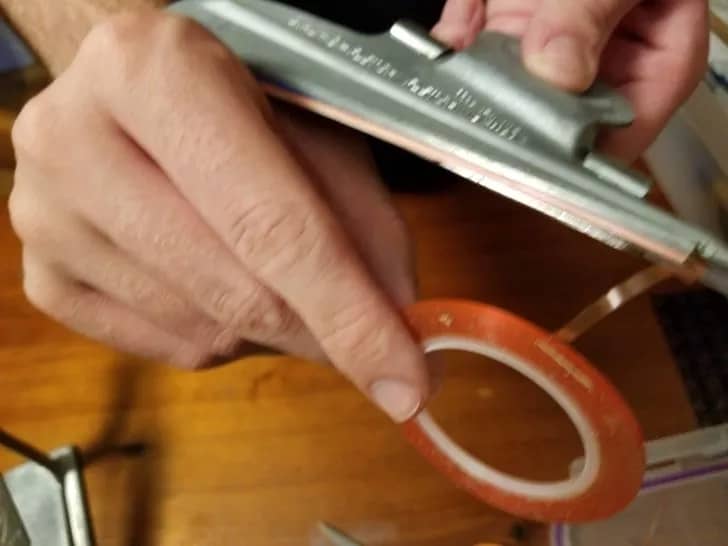
- Feather fletching tape (double-sided tape)
- Fletching jig (to attach fletching to the shaft) $35 to $90
- Taper tool (less than $10)
- varnish
Step-by-step Process
Assembling The Shaft
Wipe the shaft down with acetone to remove any sap.
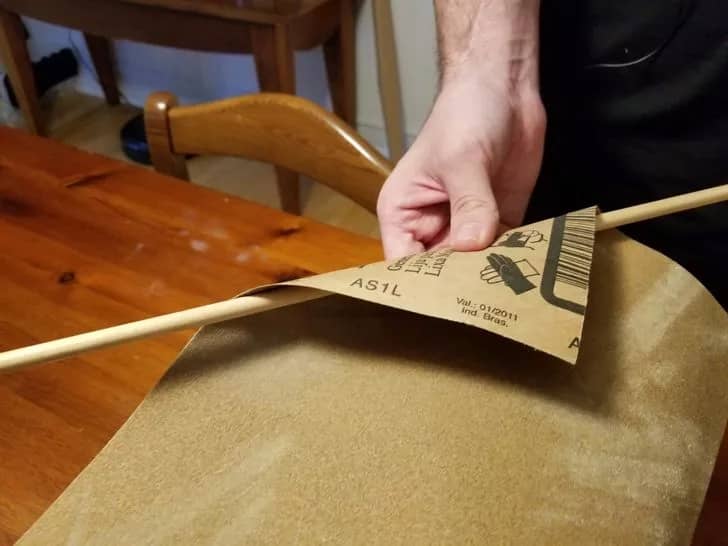
Use fine sandpaper to sand the entire shaft. It should be absolutely smooth and splinter-free.
The fletching adheres easier on the shaft. Examine the wood for nicks and damage are needed.
An application of varnish is advisable if they are left out in the open.
Shape, Straighten and Cure the Shaft
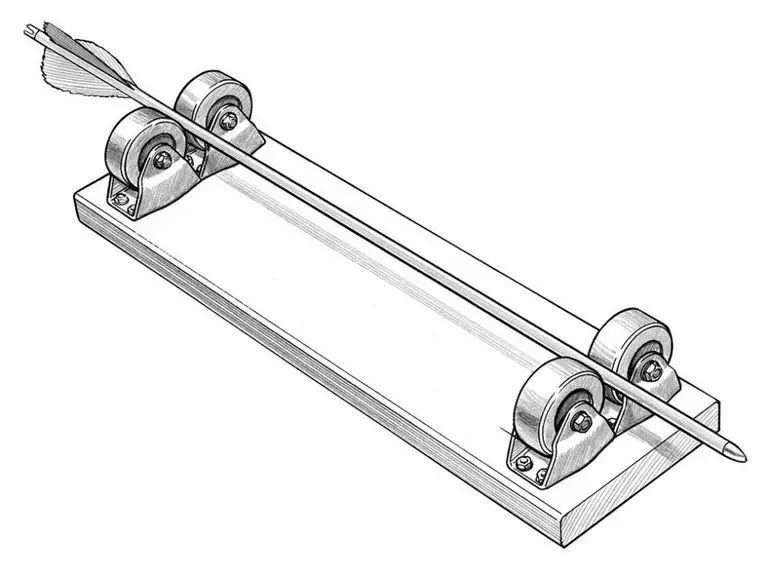
Step 1 – Any bends are brought to light by rolling the shaft in an arrow spinner.
Any curves detected should be faired by holding the arrow firmly on a flat surface and rolling it with the palms.
Repeat it till it appears straight and true in the spinner. This is a very important step, and make sure before proceeding.
Step 2 – Seal your shaft by brushing it with the acrylic floor finish and leave it to dry for 3-4 hours. Sand lightly and repeat for 3 coats.
Shaping The Ends
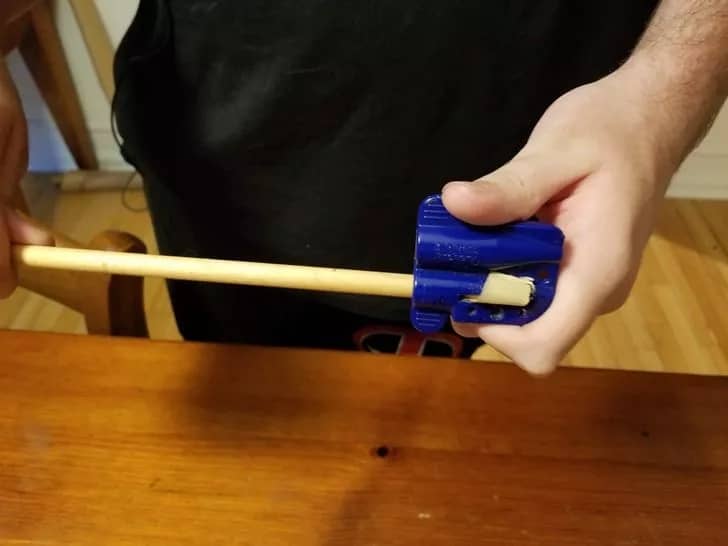
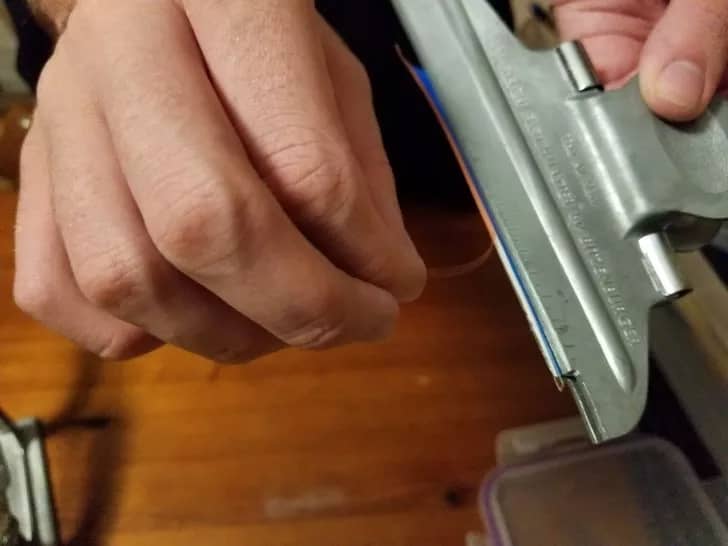
Now, use the taper tool to taper the shaft at one end to fit the nock. It’s a tool that looks like an oversized pencil sharpener.
The taper tool makes both 5 and 11° tapers; choose 11°. The tip has to be longer than the end at the nock.
Paste the super glue to the shaft end and into the glue-on point.
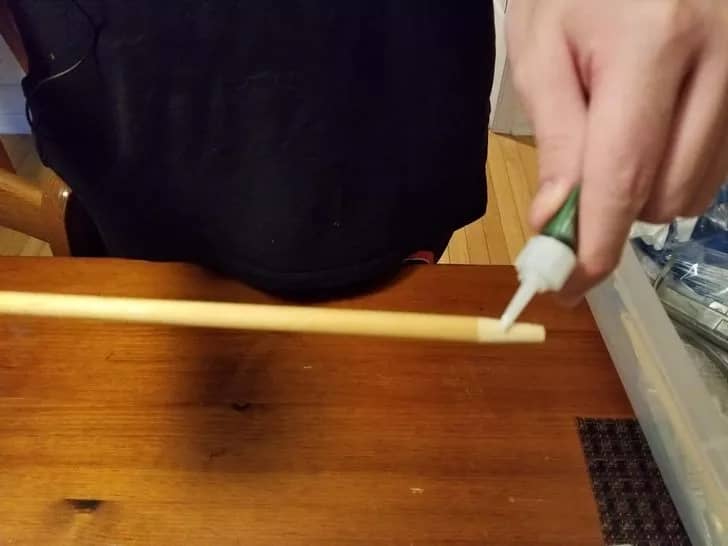
Once done, press the point into the tip holding for about 30 seconds.
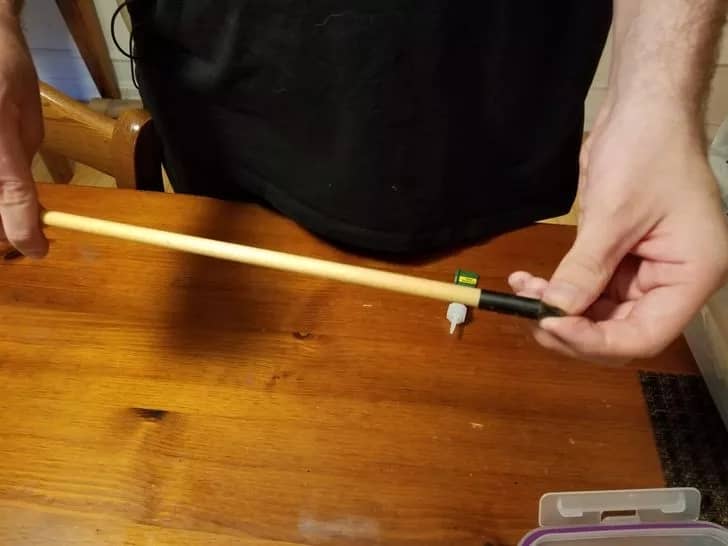
Don’t forget to sharpen the shaft on the other end. Keep the glue-on nock pressed for a minute, allowing them to join well.

Fetch The Bolts
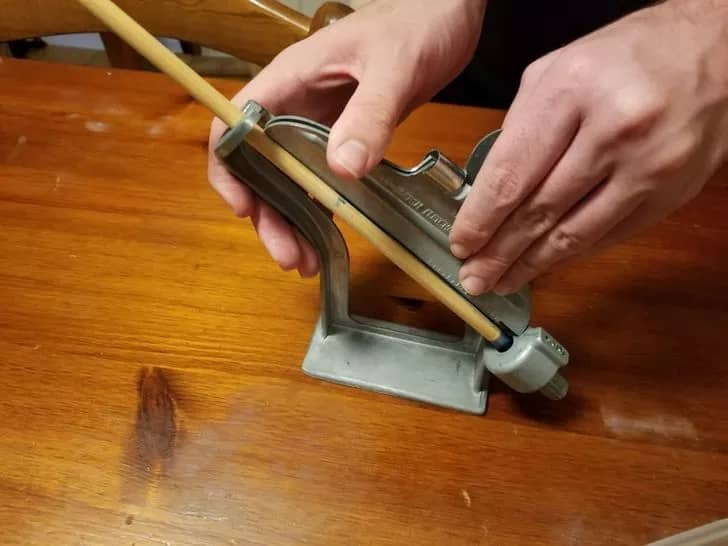
By now, the shaft should be inserted in the jig. The shaft nock should rest effortlessly into the jig.
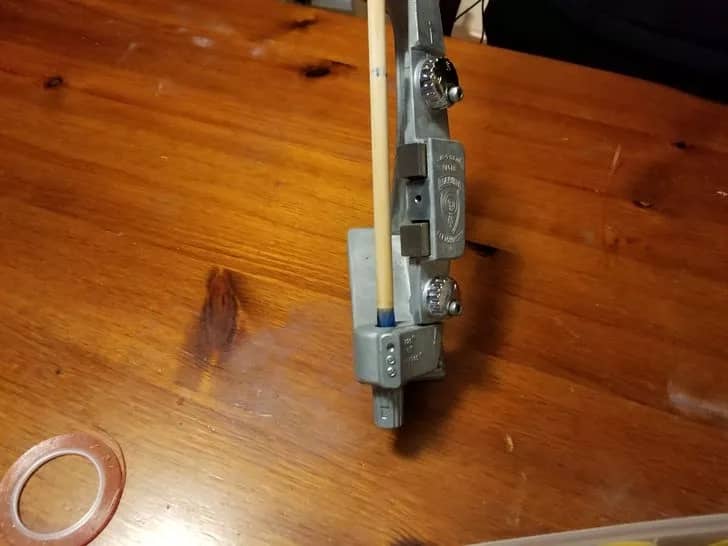
Try not to have space around it, as it might make the shaft nock wobbly.
It should fit snugly and rest flat on a stable surface before use.
Measure and cut the tape to the required length of fletching to be used.
The length of each fletching must be similar with a slight variation. The fletching goes on the bracket jig.
Put on the tape at the fletching limit.
The tape, being brittle and double-sided, is challenging to handle. Remove the protection on the tape carefully, so the fletching is not pulled out while removing the protection.
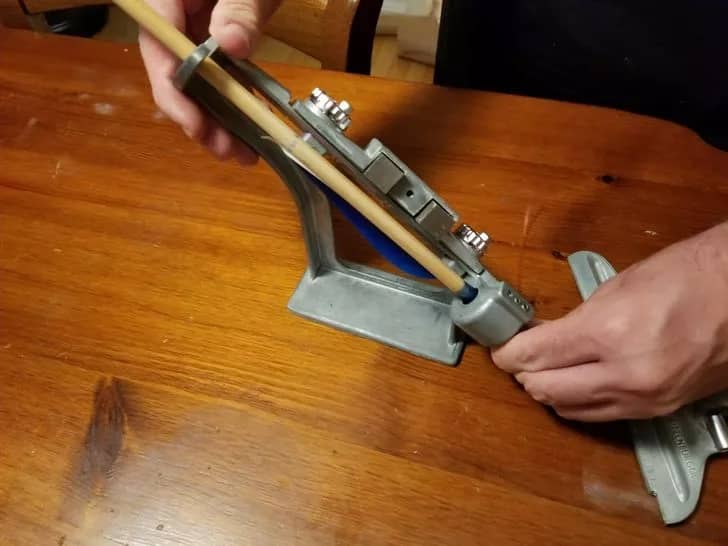
The shaft and the bracket should be clasped together. The bracket latches on the jig with magnets.
Position the bracket carefully to where you wish the fletching to be precise.
To reposition the shaft for the following fletching, turn the dial, as shown in the figure above.
Repeat till all the fletching has been attached, and that’s about it
Congratulations! Now you know how to craft crossbow bolts using different types of broadheads and nocks.
The test of the pudding is in the eating. I test-fired my arrow and was pleasantly surprised at the outcome.
It flew true, hit the target, and overall was a great success!
Hopefully, this guide on how to make crossbow bolts is informative and helpful enough that you’ll be able to make different types of crossbow arrows.
If you are a crossbow enthusiast, do try and make your own arrows. It is a sport that offers unlimited joy.
Thanks for reading this far. Happy shooting to you!
FAQs
Q. Can I Use Any Bolts in My Crossbow?
No. It’s always recommended to use the arrow/bolt your manufacturer recommends. If you don’t shoot the right arrow, there’s a chance you might end up damaging the crossbow alongside yourself and/or the people nearby.
Q. How Far Can a Crossbow Shoot an Arrow?
Traditional crossbows can shoot an arrow up to 100-120 yards with no issues. Thanks to the advanced mechanism and recurved limbs, compact crossbows can shoot a distance of around 180-185 yards.
Q. How Fast Do Crossbow Bolts Travel?
Around 200 fps (feet per second), which is surprisingly similar to the speed of a bullet fired from a handgun. However, the exact speed of the arrow depends on its weight of the arrow. The heavier your arrow is, the slower it travels through the air. The average speed is 200-240 fps.


Leave a Comment