Want to learn how to install lighted nocks onto your arrow for better accuracy? Let’s jump right in!
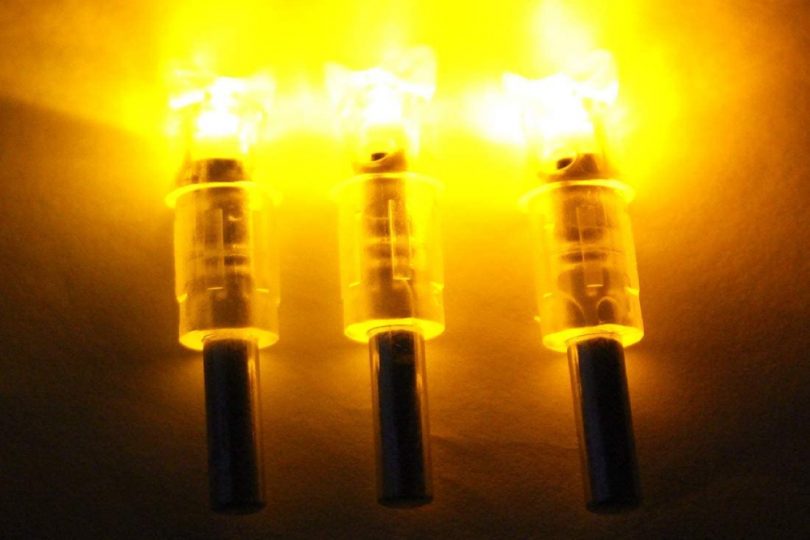
A lighted nock is an amazing archery accessory for any toxophilite.
You don’t have to keep losing arrows like in the medieval archery days and so you save bucks. Nocks make use of an LED fitted to the tail-end of an arrow. For a beginner archer, it will be a great addition.
Hunters can track the flight path of the arrow easily because of this illuminating part of the arrow. Shot placement gets more accurate and recovery is easy.
If you are wondering whether the nocturnal lighted nocks are worth it, the answer is a loud yes!
True, when compared to a traditional nock, lighted ones have their pros and cons. In our opinion, the advantages rule in favor.
How to Install Lighted Nocks: A Step-by-Step Guide

Lighted nocks are becoming increasingly popular among archers and bowhunters as a way to track their shots in the dark.
Installing them correctly is essential for accuracy and safety as well, so it’s important to know how to do it properly. Here’s how to install lighted nocks on arrows like a pro:
1. Clean the Arrow
This basic step is surprisingly often overlooked. A clean arrow is vital.
The grit on the shaft can slow down the arrow and even affect flight accuracy.
Using water or alcohol-doused Q-Tip, clean the insides of the shaft, including the nock of any traces of residue. A wet rag wipe on the outside does the trick.
2. Square the Shaft
The main objective of using an arrow-squaring rig is to make sure that the broadhead, shaft, and vanes are in one straight line.
An arrow shaft that is not squared properly will have you struggling to have good contact and connection to correctly engage the nock.
A squaring tool is used to ensure that you have a perfectly squared shaft that seats the nock perfectly in the shaft.
After the squaring process is completed, clean the shaft again.
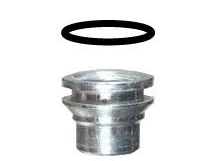
3. Trim the Nock for a Perfect Fit
To help in achieving a perfect fit, the throat of the nock has tiny ridgelines along the throat of the nock. The fit of a nock should be snug and not tight.
The simple test for this is that you should be able to install, disengage, and move the nock with your fingers alone. If this calls for a tool, then they are too tight.
In such a case, trim off one or two of the ridges for a perfect custom fit.
4. Turn off the lighted nock
Once you have retrieved your arrow you will want to switch it off.
You conserve battery life and you need it to be dark before resuming your hunt. Switching off a lighted nock varies from nock to nock.
For instance, some have a small switch that can be pressed with a pin to deactivate. Other nocks are activated on pulling the bowstring.
To switch off, they need to be pushed back in.
5. Caution
Before installing a lit or unlit nock in a shaft, the nock should be waxed. It should be seated straight in before inserting.
Once in the shaft, it should not be twisted. Not waxing the nock or twisting the nock could damage the shaft.
The nock should be seated properly otherwise the result could be a “dry fire.”
Inspect nocks before and after every shot.
Warnings
- End cap issues tips
 The end cap makes sure the battery housed in the shaft does not get dislodged and go down on impact. It is glued below the battery.
Endcap issues are not unknown with the end cap, at the first shot, coming loose.
The reasons could be one or a combination of factors- the point is broken or the arrow could have struck a very hard surface.
If the nock system forcing is installed, it could pressurize the endcap especially if the battery is not shaft centered.
If the battery shows markings or is crushed, it is an installation glitch.
When you purchase arrows that are shipped, first check if the endcap is included. If you light the nock without an endcap, the circuit is likely to get cooked.
- Target recommendations
When testing for launch speed, a person is tempted to aim at a target extremely close, say a few yards away. Big mistake. Even the best arrow may get damaged.
New targets yet to be broken in, need to be at a distance of 30 yards and beyond.
If the distance is below 30 yards, you will need to dampen the shock on impact so that the arrow is not stressed. A feedbag stuffed with rags will serve well.
The glue seal on endcaps can crack on hard new foam archery targets if positioned at closer ranges till they are broken in.
Congratulations! Now you have all the necessary information on installing lighted nocks the right way.
Conclusion
After thousands of years without any change in the basic design of a nock, the last 50 years have seen nocks come a long way.
Just like bows of any type like compound bows, crossbows, longbows, and arrows, nocks made of modern materials are now better, more reliable, and more precise.
Faced with many quality options, every archer has the chance to get that perfect setup for their needs.
Now that you know everything about how to install lighted nocks, you can make the most of your archery skills.
FAQs
Are There Any Safety Precautions to Take During Installation?
Yes, there are a few important safety precautions that should be taken when installing any new electrical device. Have a look:
- Make sure the power is off before handling any wiring or other electrical work
- Never touch an exposed wire or terminal while working with electricity and always use insulated tools
- Ensure that the area around the device is clear and no combustible materials are present
- Make sure all wiring connections are secure and firmly fastened before re-applying power
Does the Orientation of the Lighted Nock Matter?
Yes. When installing a lighted nock, you need to make sure that it is oriented correctly so that it will shoot straight and true when released from your bow. The correct orientation is to have the nock pointing forward with the light facing downwards.
Can I Use a Different Type of Battery on My Lighted Nocks?
No. It is important to always use the type of battery recommended by the manufacturer of your lighted nock. Using a different type of battery could cause damage to the nock, shorten its lifespan, and potentially cause safety hazards.


Leave a Comment