You are probably interested in this post because of your love for hunting and animals.
I believe you’re one of those folks who sought to have an animal visit whenever they want to have a good time.
No doubt, if your desire is actualized, it will be an excellent experience since it will allow you to access the timidest animals and explore more of nature’s beauty.
Actualizing this will be perfect if it’s done in the best natural way. This guide will discuss everything you need to know about making a DIY deer feeder.
We’ll answer questions like how to make a deer feeder with common household items, what kinds of deer feeders you can make at home, and the easiest ways of building a deer feeder. Let’s jump right in!
How to Make a Deer Feeder: Complete Guideline

Before we dive into learning how to make a deer feeder, it’s important to know that some great deer feeders in the market will cost you a few bucks but provide good results.
However, suppose you intend to make your own and feed animals in the absence of danger. In that case, any of the DIY deer feeders below will be a perfect gem.
1. PVC Pipe Feeders
Just as the name goes, the feeder is mainly created with PVC of sizes 4, 6, 8, to 10 inches. It is also important to keep in mind that you can also use other products like driveway whistle pipes or the Tressel type for this project.
Below is a list of three types of PVC deer feeders that you can construct within the comfort of your home.
a) Gravity Feed Deer Feeder
The gravity-feed deer feeder is one of the easiest since its operation employs the gravitational force to dish out the right amount of feed.
Aside from being the easiest, it is also known as the cheapest feeder, with a minimum of $20 -$30. Within 20 minutes, you can quickly get one ready. Now, let’s get down to business, and learn how to make a gravity deer feeder.
Materials needed:
- Five-foot, four-inch diameter PVC or a different pipe
- A grate
- PVC wye
- A plug
Procedure:
First, fix up the PVC straight one end of your 4 -5-inch diameter pipe. Now position the grate underneath the wye; this will ensure rainwater that gets stuck into the feeder is drained correctly.
To ensure water doesn’t gain entry into the feeder from its top, fix a plug at the top of the feeder you intend to use.
The plus is designed in such a way that you can set the cap on it quickly, and this helps to restrict water from gaining entering the feed.
At this phase, the feeder is quite ready for use. You can transfer it to the ideal location or hunting view and strap it on a tree or pole using ropes or ratchet straps.
Now fill up the feeder with enough corn. After that, you’ll need to fill up the opening on the wye; start from the upper part.
b) Feed-on-demand PVC Deer Feeder
The feed-on-demand is one of the most accessible feeders you can make from PVC. This time you don’t need to use any special tool or cut out any plastic.
Materials needed:
- Four small eyebolts
- A 10” x 10” piece of plywood or scrap lumber
- Camo or Spray paint
- Purple primer
- 2½ -3- length of 6” PVC pipe
- 6” slip-over PVC cap
- 6” PVC wye.
- Cement
Procedure
First of all, you need to prime the edge end of the PVC pipe and, at the same time, repeat the process on the other side of the wye. Position both pipes together and then add some amount of cement.
Drill up two holes directly on either side of the pipe, and ensure it is directed halfway upward while you place two eye bolts. The eye bolts will help attach the feeder to a tree or pole using a ratchet strap or a rope.
Ensure you add the slip over the cap of the PVC and create a little hole to get across the top.
Create a different hole. It should be on the side of the PVC while you close to the cap where you intend to place the last eyebolt.
This will help prevent and control nasty critters that want to pull off the entire lid meant for the feeder.
You’re creating a feeder and not one of those toilet fixtures, or do you want it to look like a toilet fixture? I guess the answer to that question is a NO! So, to avoid this, use simple paint on it and allow it for a few days to dry properly.
Lastly, fill the feed with about 40 -50 pounds of dried corn. Once that is done, set the feeder to the desired location.
Don’t forget to fix it on scrap lumber or plywood top; this will help keep bugs away. Securing the feeder to a fence, tree, or durable post is vital.
c) Red Neck Deer Feeder
Creating this feeder can be pretty simple once you know how to go about it. If this is unlike you, you can carefully adhere to this instruction below.
Materials needed:
- 6” PVC pipe
- Camo paint
- Cap
- 3¼-inch plywood
- 36” drywall
- Drill
- Furniture glue
Procedure:
Once you cut the pipe to an approximate size of 4 -5 inches, select a shorter or longer length, which depends directly on what you need.
It is crucial to scuff off the surface of the PVC pipe you want to use; this is to ensure the camo paint holds appropriately.
Now attach a round wood using glue and ensure the block of wood used fits perfectly with the entire pipe diameter.
Ensure the PVC is mounted directly on the base while it covers the entire wood used. Try to create some holes across the circular block and the pipe.
You will have to drill a 4-3″ hole or something a bit smaller and position it on the base of your pipe; this hole is meant to allow corn seeds to ooze out from the feeder.
Place the cap on the PVC’s upper part, which helps control rain from gaining access to the feeder. Create another circle and make sure it has a similar diameter compared to the size you cut earlier. Now stick it directly to the drywall.
Create another hole across the center and ensure it goes across the drywall.
This is an important gauge that will allow a slow drop once an animal feeds off the corn. It will also help notify you of the right time needed to make another refill.
You can also paint the drywall. Doing this will make it more visible.
Lastly, carry out some camo painting on the feeder and make sure it is properly dried. Once all the above steps are in place, you’re good to go.
2. Bucket and Barrel Deer Feeders
Now, let’s explore how to make a homemade deer feeder using buckets and barrels you have lying around.
This is yet another fashionable style of deer feeder; it has to do with the use of barrels or buckets. We recommend using trash cans or plastic barrels.
One of the surprising differences in a feeder constructed from this method is its ability to retain enough food. You can also position it so that the deer has to nudge the bottom whenever it attempts to get some meal from it.
You can place an automatic timer and spinner as an addition to this style –if you intend to convert it to an automatic feeder.
Our primary style here includes:
a) 5-Gallon Bucket Deer Feeder
Materials needed:
- A sturdy rope
- Metallic tin
- An old-fashioned broom handle or a simple metal rod.
- 5-gallon bucket
Procedures:
Create a hole underneath a five-gallon bucket. Make sure the hole is about ¼ inch – ½ inch, a bit larger when compared to the old-fashioned broom handle.
Place two nails at the side of the broom handle and ensure it is in an opposing direction; the pin should be at least 6 inches long from one end.
With the longer end facing downward, slide the broom handle directly into the bucket and ensure it gets across the hole you drilled.
If the nail is placed correctly, it will ensure the handle is secured and prevent it from falling off.
Use the sturdy string to tie one part to the bucket’s handle. At the same time, you extend the string directly to the brand while ensuring the broom handle is kept hanging about 3-5 feet above ground level.
Ensure the bucket is filled with enough corn before closing the lip; this will help secure water droplets from getting into the feeder.
It is also advisable to spread enough corn seeds at the feeder’s base. The metallic tin should be attached directly to the metal rod or underneath the handle.
If this is carried out correctly, with time, the deer learns how to nudge the metallic tin to get more corn from it.
b) Barrel Deer Feeder
You can also create a feeder with 30-35 barrel gallons, which can be purchased at an affordable price (most times). The feeder can quickly be filled with various grains, e.g., oats, black oil, sunflower, corn, or different grain.
It works wonder when used on the ground since it will not just feed deer but also feed poultry birds as well. Here is how to come up with a perfect barrel feeder.
Materials needed.
- A 55-gallon barrel made of plastic-free from chemicals or pesticides
- A PVC feeder wye/ head
- A 2 x 4 lumber piece
Procedures:
To get started, you will need to wash all the barrels properly.
Now cut the lid that is located on the barrel. To do this, cut out the edge of the barrel; this will help create a perfect opening via which grains can be channeled directly into the feeder.
Avoid cutting the barrel with a torch since this can lead to vapors and explosions. We recommend using a saber saw since it is most suitable to carry out the task properly.
At the end part of the barrel, cut out a ring shape; the shape is needed to fit the head of the PVC on it.
Use glue to attach the head of the PVC while assembling it correctly to create a passage; the corn poured into the feed will get across the created gate.
Now you can build a complete base using a barrel feeder and lumber piece.
Once all is set and done, it’s time to feed enough corn into the feeder. Afterward, close the lip to help keep water off its surface, then use straps to create enough support.
c) 55-Gallon Gravity Deer Feeder
Creating a gravity feeder at home can also be a tick-tack activity since the process is cheap and easy; you don’t have to go 360 degrees.
Material needed:
- 55-gallon barrel made from plastic
- A 4-inch PVC for tube feeders
- Treated 2 by 4 by 8
Procedures:
- Once your barrel is washed thoroughly, cut across the upper part of the barrel and take off the lip.
- Make a round hole where the wye will fit into it perfectly. You can do this using a hl jigsaw.
- Place the wye directly on the bottom hole and use a plastic adhesive to glue it properly while assembling the feeder.
- Finish up the entire process by creating a perfect design on the feeder using the camo paint, though this is optional.
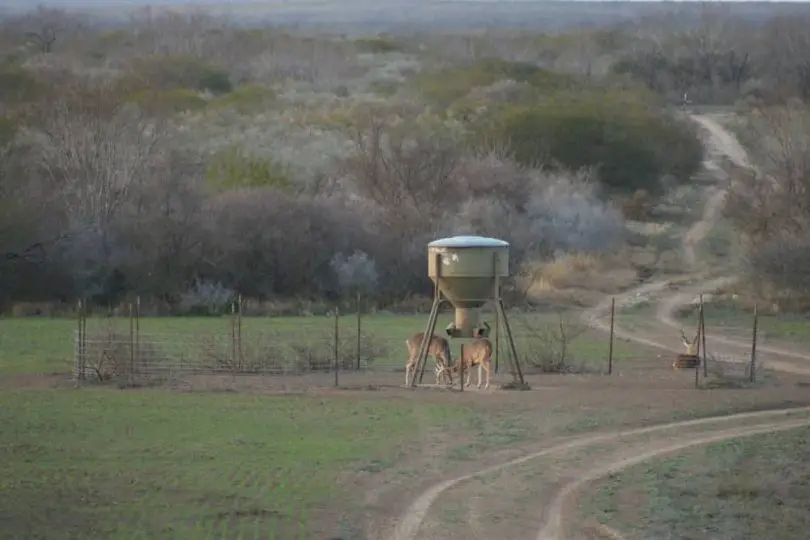
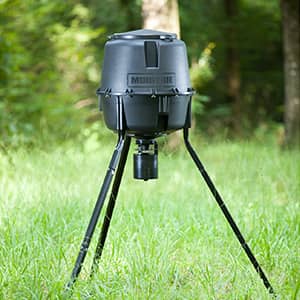
3. Tripod Deer Feeder
These feeders are created from three stumps, hey feeders, and wooden stands; they are similar to feeders used when feeding cattle, sheep, and goats.
Deer feeders that are grouped within this category can usually stand on their own or are added manually.
Regarding these feeders, there are four excellent affordable, fun-to-use, and straightforward plans you can use. Let’s take a brief look at each of these plans.
a) Wooden Deer Feeder
Caution: Before starting, it is imperative to take proper measurements, use professional work tools for drilling and cutting, and use waterproof adhesive on the constructed joints.
Ensuring all these are in place will help you create a perfect, professional, stable, and rigid structure.
Materials needed:
- 4 by 4 lumber- 3 pieces
- 2 by 2 lumbar- 2 pieces
- 3/4” plywood- 1 piece
- 2 by 4 lumber- 6 pieces
- 2 by 4 lumber- 2 pieces (for the rafters)
- 2 by 6 lumber- 2 pieces
- 3/4” plywood- one piece
Tools:
- Jigsaw, miter saw
- Safety gloves
- Drill machines, drill bits
- Carpentry pencil, tape measure, spirit level, chalk line
Procedures:
Planning and designing a perfect frame will be your first step to actualizing this project.
You will need to create pilot holes through the component and then screw up 2 ½ inches 22 1/2 inches. Confirm that the entire corners are all in right angles.
The next phase is to attach the 4×4 legs directly to the frame and screw it properly. Dig a hole about 20 inches deep and try to secure the feeder stand directly to the ground.
Fix the 2×2 cleats on the interior part of the frame –this is carried out by drilling a pilot hole across the clits and then fastening it firmly to the frame using screws.
Now you will have to fix a piece with an approximate size of ¾ inches, and it is crucial to ensure the entire edge is well smoothened; this will make all parts and joints –gap-free!
Now you have to fix the rafters on the vertical support system that was created with drill holes and screws. Use ¾ inches of plywood. Fix the sheets directly on the rafter and ensure all the edges are correctly aligned.
Finally, give the feeder a perfect and professional outfit and ensure the gaps and holes are filled with wood fillers.
Afterward, allow it for a couple of hours to get dried.
b) Homemade Deer Feeder Trough
If you want to know all the steps of setting up a deer trough feeder, stick closely to the guide below.
Materials needed:
- 30-gallon barrel made from plastic
- 2 ½” screws
- Iron sheet
- Lumbar size of different pieces
- Drill
Procedures:
?You will need to cut the barrel you intend to use into half and ensure both halves are equal.
Proceed by constructing a durable table/ base that will suit the table you intend to use on the feeder. You will need to screw all the different lumber pieces together.
Afterward, you need to sit the trough on the table/base you have constructed, then try to make the necessary adjustment and make sure it sits properly.
Create a hole to get across the trough on the table frame, then insert 2 ½ inches screws on it; this will help keep the trough in place.
Use some vertical support – you can use long lumber. The lumber will also add some support to the iron used to help prevent water from gaining access to the feeder.
You can give the feeder a camo touch, though this is optional.
Lastly, transfer the feeder to the ideal location where you fill-up the trough with enough corn, all set and ready for the deer to visit.
c) V-style Deer Feeder
This is also one of the A, B, and C Deer feeders you can fix within a few minutes.
Material needed:
- Electric drill
- 2, 10 foot 4 by 4 lumber piece
- 8 by 1½” wood screws
- 2, 8 foot 2 by 4 board made from wood
- Roofing nails
- 2, 8 foot 2 by 12 lumbar board
- A tin of roofing sheet
- Wood file/ rasp
- Grit sandpapers
- 10 sinker nails
Adherence to the steps below will go a long way if you intend to develop something durable and professional.
Procedures
First of all, you’ll need to fabricate a feeder in a trough-shaped. Cut out the board into three different foot pieces; this piece will be used to make the sides of the trough.
The other two-foot piece should be cut into two halves and assembled to create one-foot pieces. Afterward, ensure the board is secured using screws.
Use the screws to fasten the trough directly on the post at about 32 inches above ground level with 10 penny nails. It is vital to make sure you level them properly.
d) Deer Feeder for Enclosed Pen
If you intend to create a feeder that can be used in a closed pen, you can go further with the instruction below.
Materials needed:
- Electric drill
- Lumber posts made from different sizes
- 8 by 1½” wood screws
- A plastic piece cut out from a barrel
Procedures:
Create a base by fixing up four-post directly on the lumber board. Make enough holes across the lumbar pieces and use a screw to attach the poles. Ensure the board is lowered a bit to the ground.
Move the base straight to the pen and position it on top of four different stones, arrange it, and ensure it matches perfectly with the four corners.
Add up some lumber pieces on the top of the feeder; this will serve in place of the roof. Afterward, use the round plastic created and place it on the center of the baseboard, attaching it firmly with screws.
The sole aim of the round plastic is to ensure the corn remains within the feeder.
Conclusion
Congratulations! Now you know how to make a deer feeder in multiple easy, affordable, and effective ways.
The good news is all the steps are easy to startup and can be done with less expensive materials, and above all, it takes less time.
The whole plan is categorized into three; these are; barrel/bucket, trough feeders, and PVC. And each method mentioned above works perfectly if adequately planned and designed.
You can choose one from any of the above plans and stick to all the steps outlined to get something perfect.
FAQs
Q. 1: Where should I put my deer feeder?
A. Deers find it most comfortable to feed during the dark hour, evening, or early in the morning. So it is crucial to know the right position where you intend to place the feeder, but this should be a place where it will stalk perfectly.
Q. 2: Do feeders spook deer?
A. No, deer don’t get spooked by feeders. Although most times, this can also depend on how the feeder is used. If you have a deer close to the feeder and eventually it goes off for no reason, then the feeder might be a bit scary.
Q. 3: Do feeders scare big bucks?
A. Emphatically yes! Using a spin feeder during summer can lead to this effect. Take the feeder downwards and empty it to the ground two months before the season. Most mature bucks will avoid the feeder while it’s fixed on a pole, but they quickly access it when it is on the ground.
Q. 4: Does baiting deer make them nocturnal?
A. Baiting does not make deer go nocturnal. Deer go nocturnal when exposed to pressure. Using bait piles will only encourage more nighttime feeding. A bait pile of fewer than two gallons will only give more room for competition and cause the deer to visit a bit earlier.
Q. 5: When should deer feeders go off?
A. Do you want your feeder to go off once you’re in the stand? Or probably you want it before the first light or after it becomes dark to allow enough time for it. Once the feeder is off at night, the deer feeds perfectly once it is dark.


Leave a Comment